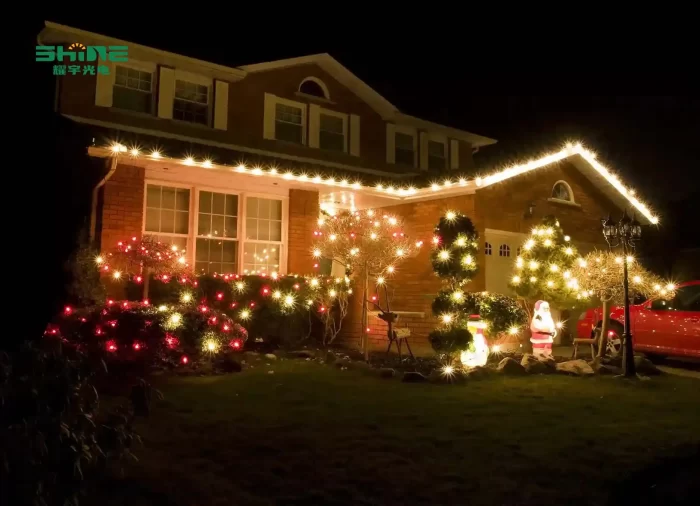
What makes outdoor eave lighting essential for home safety?
Walk out at night and look at your home from the sidewalk. Can you read a visitor’s face at the door without squinting? Can you see the edge of each step and the threshold line where shoes catch? If not, your eave lighting is underperforming. Safety at night isn’t a contest of who has the brightest flood; it’s about putting gentle, shielded, well-aimed light on vertical surfaces where human decisions happen (faces at the door, house numbers, gate planes) and then adding a responsive burst only when someone moves through your space. That pairing isn’t just common sense—there’s rigorous evidence that targeted nighttime lighting lowers crime in public settings, and professional lighting guidance prioritizes vertical illuminance and glare control for recognition. A randomized experiment in New York found roughly a 36% reduction in night-time outdoor index crimes near treated sites after lighting upgrades, while security lighting guidance emphasizes vertical light for identification rather than indiscriminate brightness.
There’s another dimension to safety that homeowners often notice only after a scare: falls. In older adults, falls are the leading cause of injury, and about 1 in 4 report a fall annually. Environmental hazard programs that include improving poor lighting have been shown to reduce falls in several settings, though effect sizes vary by population and implementation. The takeaway for a house with long eaves is straightforward: better light at edges and thresholds helps people stay upright.
The result? Outdoor eave lighting is essential to home safety because it helps you see faces, read edges, and respond to approach without creating glare, wasting energy, or provoking neighbor complaints. Done right, it’s quiet, warm, and precise—safety you can actually see.
Why eave lighting changes real-world safety outcomes
Eave lighting sits at a unique vantage point. Unlike posts or yard spikes, eaves are high, sheltered, and already wired. That makes them perfect for three safety tasks:
-
Reveal faces and information (door viewers, peepholes, house numbers) through vertical illuminance rather than brute ground wash. Professional security lighting resources stress vertical light and glare control because we identify people by facial cues, not by the brightness on the pavement.
-
Outline edges where trips happen—step nosings, thresholds, low planters, hose bibs—so the eye gets clear shadow relief instead of veiling glare.
-
Trigger a response—motion-boosted light that spikes in brightness for a short window when someone approaches, a pattern that experts often favor over leaving fixtures blazing all night.
From an evidence standpoint, the NYC randomized lighting experiment is important: it demonstrates a causal path between better night lighting and reduced crime in public housing settings. A single-family house is different, of course; we infer the direction of the effect (visibility plus surprise tends to reduce opportunity) without claiming the same magnitude. Pair lighting with locks and cameras, and you get the trifecta: see, record, and act.
On falls, public-health data are unequivocal: the burden is high, the mechanisms are mundane (missed edges, shadows, poor contrast), and better light is one of several proven levers. Incorporating eave lighting that outlines edges and clarifies steps is a pragmatic step with outsized benefit, especially as households age in place.
The F-L-O-W under Eaves™ blueprint for eave lighting safety
F — Field-of-view (vertical light on faces/info) → L — Layers (ambient/task/response) → O — Orientation (height/aim/beam/PIR) → W — Weather/Wherewithal (ratings, shielding, CCT, upkeep)
This original framework turns vague “add a light” advice into a sequence you can design and check in 30 minutes at dusk.
F — Eave lighting for Field-of-view (see faces without squinting)
Stand 10–12 feet from your door at night at roughly eye height. If a person standing in the doorway is clearly recognizable—eyes, nose bridge, mouth curvature—your vertical light is probably adequate. If you see a bright hotspot overhead and a raccoon-mask shadow across the eyes, you’re fighting glare, not boosting safety. Professional guidance in security lighting emphasizes recognition: that comes from vertical illuminance, not from blasting the ground plane. At eaves, the fix is usually shielded, warm down-lighting aimed to skim the door plane, not the viewer’s eyeballs.
Action cue: Aim and trim the optic so the source itself is hidden at typical viewing angles from the street. When the source is visible, your eye contracts, your contrast sensitivity drops, and facial detail disappears.
L — Layered outdoor eave lighting (ambient + task + response)
Ambient (low): Use fully-shielded downlights under eaves to erase “black holes” along walls and porches. Keep output modest; the goal is perception of continuity, not a showroom.
Task (focused): Tight beams highlight edges—step nosings, thresholds, house numbers—so the visual system reads contrast effortlessly.
Response (event-based): Add motion-activated light that jumps to 3–4× brightness for 1–5 minutes when someone enters approach zones. Security pros frequently recommend motion over all-night brightness because it creates a salient cue without bathing the neighborhood in glare.
O — Under-eave lighting orientation: height, beam & motion detection that actually works
Most consumer PIR sensors are tuned around 8 ft mounting height. Under tall eaves (10–12 ft), the sensor looks “over” people unless you aim the head down and align zones so visitors cross the detection pattern instead of walking straight at it. Manufacturer guidance and installer practice both highlight this: PIRs catch sideways motion best, not straight-on approach. Think of the sensor like a picket fence of invisible slices—people crossing the pickets trip it; people walking along the pickets may not.
Beam & spacing: For doors and narrow features, 30–40° beams at 9–10 ft eaves often land in the 6–8 ft spacing ballpark to avoid scallops on the wall. As beams widen—or eaves rise—you can open spacing, but always confirm with a night walk test because texture and reflectance vary by facade. (Practice-oriented soffit guidance lands in the same range.)
W — Weather & Wherewithal for outdoor eave lighting (ratings, shielding, color, upkeep)
Per code definitions, areas protected by roofs or canopies are typically damp locations. Under eaves, that’s your default assumption; however, if wind-driven rain routinely hits the fixture face, treat as wet and choose fixtures/listings accordingly. Seal junction boxes, use listed fittings, and maintain gaskets. Combine that with fully shielded trims and ≤3000K warm color temperature to minimize glare, improve facial rendering, and respect neighbors and wildlife—guidance that aligns with dark-sky best practices for residences.
Maintenance: Clean lenses and sensor windows every few months. Sweep spider webs; they do trigger false alarms.
Eave lighting zones that matter most (front door, side yard, driveway, steps)
Front door eave lighting: facial recognition without glare
-
Center a fully shielded downlight over the threshold, warm 2700–3000K, with the optic tilted to skim the door plane.
-
Add a second, narrower beam to cut across the step edge and threshold line; this defines edges with a crisp highlight rather than flat wash.
-
Pair with a motion-boost mode or a separate shielded motion unit that spikes to a higher output on approach for 1–3 minutes; this is often favored by security specialists over leaving a lamp on all night.
-
Do the face test from the sidewalk: if facial detail reads without squinting and the source isn’t glaring, your aim is right (security lighting guidance emphasizes vertical light).
Side gate eave lighting: approach control, not flood wars
-
Mount motion units so people cross zones at a slight diagonal. Under high eaves, aim down to recover PIR range.
-
Use narrower beams to paint the gate plane and latch area rather than sending stray light into a neighbor’s windows.
-
If wildlife corridors (like a hedgerow) are active, prefer the warm end of the spectrum and shorter on-times.
Driveway outdoor eave lighting: orientation and context
-
Replace front-yard blast with a low ambient under-eave ribbon: shielded trims every 8–12 ft to erase black voids on the facade, not to bleach the pavement.
-
Add response points at the garage corners and a task beam on house numbers.
-
Integrate lighting events with camera recording for contextual footage (motion → brighten → record).
Steps, stoops, and thresholds: trip-hazard triage with eave lighting
-
Your enemy here is low contrast. A tight, warm beam cutting across step nosings creates “readable” edges.
-
Keep ambient low so edges pop; high ambient erases contrast and can reduce safety.
-
Where risers are deep, consider alternating “short throw” beams under the eave and low side lights for stairs.
Specifying eave lighting hardware with less guesswork
Ratings: damp vs wet for under-eave lighting
Under a roofed overhang, fixtures usually need a damp-location listing. If the face or electrical box is exposed to direct or wind-driven rain, move to wet-location listings, and make sure boxes, fittings, and caulks respect the same rating logic. This isn’t mere paperwork; it’s about gasket design, corrosion resistance, and long-term safety.
Optics & shielding for outdoor eave lighting
-
Prefer full cutoff trims where the light source is hidden at normal view angles.
-
For door planes or house numbers, use 30–40° beams; for soft eave wash, look to 60–90° with shielding.
-
If you can see the bare LED from the sidewalk, you’re bleeding glare and likely reducing recognition at the door.
Color & fidelity in eave lighting
Stick to 2700–3000K at homes. Warmer light supports night adaptation, renders skin tones credibly, and aligns with dark-sky and neighbor-friendly practices. If your camera pipeline benefits from a slightly cooler cast, tune it in the camera, not in the light.
Controls: motion-boosted eave lighting that deters without drama
-
Photocell + schedule: bring a low ambient ribbon on at dusk.
-
Motion boost: jump to 3–4× output for 1–5 minutes on approach (experts often recommend motion rather than all-night brightness).
-
Scenes with cameras: link motion spikes to recording; lighting improves exposure so faces don’t blow out.
Installation truths about under-eave lighting most people miss
-
PIR mounting height matters: 8 ft is a common sweet spot; higher eaves require aiming down and arranging paths to intersect PIR lobes. Straight-on approach is inherently weaker than cross-motion. (Manufacturer/installer guidance.)
-
Avoid hot-air triggers: don’t aim sensors at HVAC exhausts or dryer vents; moving warm air can trip PIRs.
-
Moisture paths: treat under-eave boxes and penetrations as moisture-managed cavities; pick fittings and sealants consistent with damp/wet designation. (NEC/NFPA language).
-
Photometrics for peace: if your municipality or HOA is touchy, sketch a simple photometric intent (where light lands and where it doesn’t). It’s neighbor diplomacy backed by a plan.
How eave lighting stacks with cameras, locks, and alarms
Lighting isn’t a lone hero. It’s one leg of a three-leg stool:
-
Lighting: see faces, read edges, create a response cue.
-
Cameras: record usable frames with fewer blowouts/shadows.
-
Locks/alarms: provide mechanical and audible barriers.
The NYC RCT underscores that lighting changes behavior in shared outdoor spaces; at home, you multiply benefits by pairing night-usable images with the surprise factor of motion-boosted light.
A 30-minute eave lighting walk-through you can do tonight
-
Face test at the front door (5 minutes): from the sidewalk, can you read facial detail without squinting? If not, adjust aim or add a shielded eave downlight. Vertical light is the safety driver here.
-
Edge audit (10 minutes): identify every step, threshold, hose line, and planter edge. Mark dark edges with painter’s tape.
-
Motion sanity check (5 minutes): walk approach paths at different angles; if the PIR misses you unless you wave, rotate the head to catch cross-motion and, if needed, tilt down from high eaves.
-
Neighbor lens (5 minutes): step onto the street and check for visible sources; if you can see LED chips, add shielding or lower output.
-
Timer & color pass (5 minutes): set motion hold to 1–3 minutes; confirm 2700–3000K.
Buying guide: short list for eave lighting that works
-
Listing: Damp under cover, Wet if rain hits the face.
-
Shielding: Full cutoff or deep regress; source invisible from across the street.
-
Beam: 30–40° (door/number), 60–90° (wash).
-
CCT/CRI: 2700–3000K; decent CRI for true-to-life faces.
-
Controls: Photocell + motion; 1–5 minute boost.
-
Hardware: Gaskets, powder-coated housings, stainless fasteners.
-
Docs: Clear cut-sheet for PIR coverage at your mounting height; under-eave install notes.
Frequently Asked Questions about eave lighting
Does eave lighting need to be on all night to be “safe”?
No. A low ambient ribbon plus motion-boost is typically more effective: it creates a salient event when someone approaches, reduces energy waste, and avoids constant glare. Many security pros recommend this over always-on brightness.
Are eaves considered damp or wet locations?
Under a roof/soffit is generally damp by code definition; if wind-driven rain or splash hits the fixture, treat as wet and choose listings accordingly. Seal boxes and fittings to match.
What color temperature works best for outdoor eave lighting at home?
2700–3000K warm white. It’s easier on eyes, better for neighbors and wildlife, and still delivers recognition at the door. That aligns with dark-sky best practices.
Why does my under-eave lighting motion sensor fail to detect people?
PIRs prefer side-to-side motion. At high eaves, the sensor can “see” over people; aim the head down and rotate so paths cross the detection pattern. If possible, mount near 8 ft to stay in the sweet spot.
Can eave lighting really reduce crime at a single-family house?
We have causal evidence in public settings (NYC RCT) that better lighting reduces night crimes. For homes, apply the principle: visibility + surprise (motion) lowers opportunity. Combine with locks and cameras for best results.
How far apart should eave lighting fixtures be?
For downlights with 30–40° beams at ~9–10 ft eaves, start with 6–8 ft spacing and tune by night testing to avoid wall scallops and shadow bands.
Will outdoor eave lighting bother my neighbors or wildlife?
Not if you shield the source, stay warm (≤3000K), and use timers/motion instead of all-night brightness. That’s the dark-sky recipe for residential lots.
Are there code issues unique to under-eave lighting?
Beyond the damp/wet distinction, ensure proper box fill, fittings, and weather-resistant wiring methods. If you’re near property lines or in HOA territory, a simple photometric intent sketch prevents complaints later.
Your next moves: make eave lighting the quiet hero of your home
You don’t need stadium floods to feel safe. You need F-L-O-W:
-
Field-of-view: Put vertical light on faces and information, not into eyes. (Security guidance backs this.)
-
Layers: Keep a low ambient ribbon, add task light on edges, and let motion do the talking when someone approaches. (Often favored by security experts.)
-
Orientation: Aim beams and PIRs for cross-motion; recover range under high eaves by tilting down. (Manufacturer practice.)
-
Weather/Wherewithal: Choose the right damp/wet listing, shield the source, keep it ≤3000K, and maintain gaskets. (NEC/NFPA + dark-sky).
Five concrete steps this week
-
Do the face test at the door; adjust until faces read without squinting.
-
Add a motion-boost path at entries/gates; 1–3 minutes is enough.
-
Swap any dry-location fixtures under eaves for damp/wet-listed equivalents; reseal boxes.
-
Install a narrow beam across each step edge; confirm contrast from 10–15 feet.
-
Set CCT to 2700–3000K and verify the light source is not visible from the street.
Key takeaways on eave lighting
-
See faces, not hotspots. Vertical light on doors is safer than raw ground wash.
-
Motion beats “always on.” Spikes on approach deter without constant glare/energy waste.
-
Match the environment. Eaves are damp (often effectively wet in storms); pick the right listings and seals.
Sources (selection)
-
Crime & lighting (RCT): Measuring the Effect of Street Lighting on Crime Using a Randomized Experiment (NYC public housing). (nber.org).
-
Security lighting guidance (vertical light, glare control): CDSE resources summarizing IES principles. (cdse.edu).
-
Falls prevalence: CDC falls data (2024–2025). (cdc.gov).
-
Environmental fall prevention (lighting included): Cochrane reviews/summaries. (cochranelibrary.com).
-
Dark-sky best practices for homes: International Dark-Sky Association. (darksky.org).
-
NEC/NFPA definitions (damp/wet): NFPA documents and NEC change logs. (nfpa.org).
-
PIR under-eave mounting realities: Heath-Zenith installation sheets and practice notes. (heath-zenith.com).