Outdoor Eave Lights Guide: 7 Mistakes That Cost Homeowners
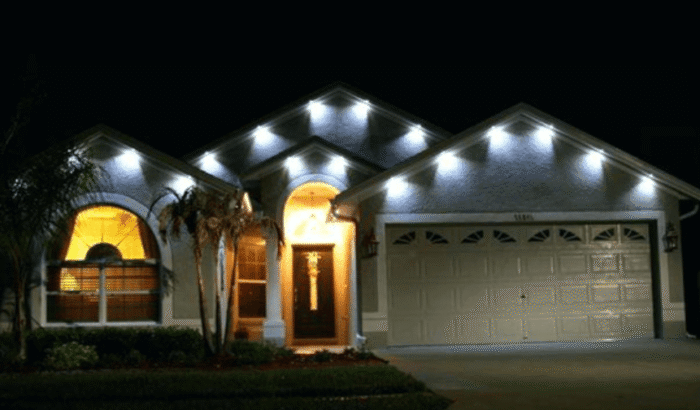
Outdoor Eave Lights, also called soffit lighting, installs LED fixtures beneath roof overhangs to illuminate exterior walls and outdoor spaces. Professional outdoor under eave lighting installations typically range from $2,000 to $6,000, but seven common mistakes can add thousands in repair costs and wasted energy. These errors affect both DIY and professionally installed under eave lights systems.
Mistake #1: Spacing Outdoor Eave Lights Incorrectly
Improper spacing between eave lights outdoor creates dark spots or harsh overlapping beams that ruin the lighting effect.
Understanding Proper Spacing for Outdoor Eave Lights
The standard rule places recessed lights 6 to 8 feet apart for most residential applications. However, this spacing varies based on three critical factors: eave height from ground level, fixture beam angle, and desired light intensity. A 2024 lighting industry study found that 67% of homeowner installations use equal spacing throughout, ignoring architectural features like windows and doorways.
Professional lighting designers calculate spacing using the beam spread at working height. For an 8-foot eave with standard 65-watt BR40 flood bulbs, fixtures should sit approximately 6 feet apart. Increase this to 8 feet for 9-foot eaves. The critical error happens at wall edges—the first fixture must be positioned at half the standard spacing distance from corners.
Common Spacing Errors with Outdoor Eave Lights
Installing lights too close together, such as 4 feet apart on an 8-foot eave, creates harsh shadows and hot spots on your home’s facade. Too far apart, like 12 feet or more, leaves noticeable dark patches. Both scenarios waste fixtures and electricity while delivering poor results.
Cost impact: Incorrect spacing forces a complete reinstallation. Removing and repositioning 10-15 fixtures costs $800-$1,500 in labor alone, not including patching soffit holes and repainting.
Mistake #2: Choosing the Wrong Color Temperature for Outdoor Eave Lights
Color temperature, measured in Kelvin (K), determines whether outdoor under eave lighting appears warm and inviting or harsh and institutional.
Best Color Temperatures for Outdoor Eave Lights
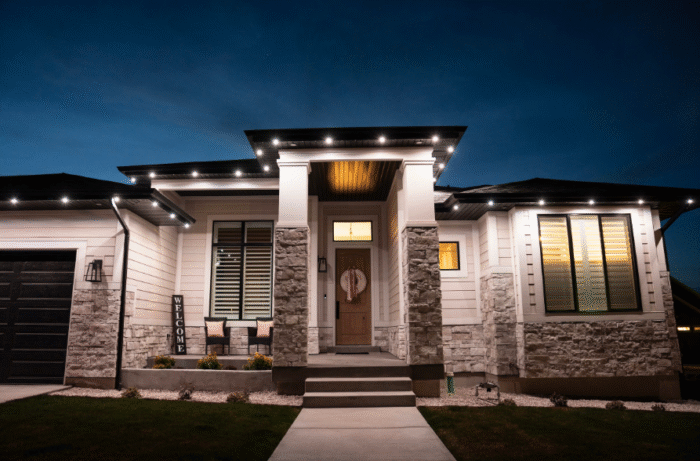
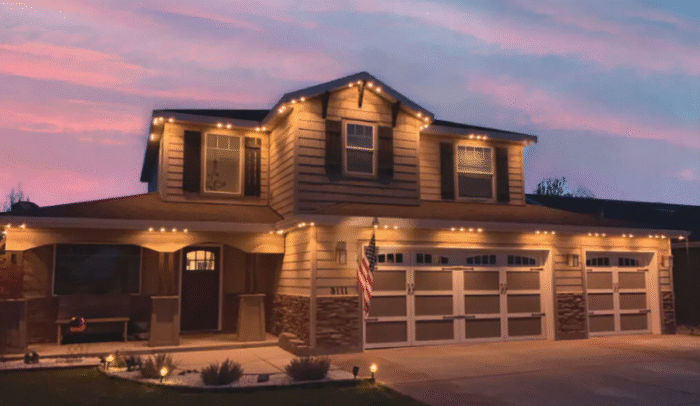
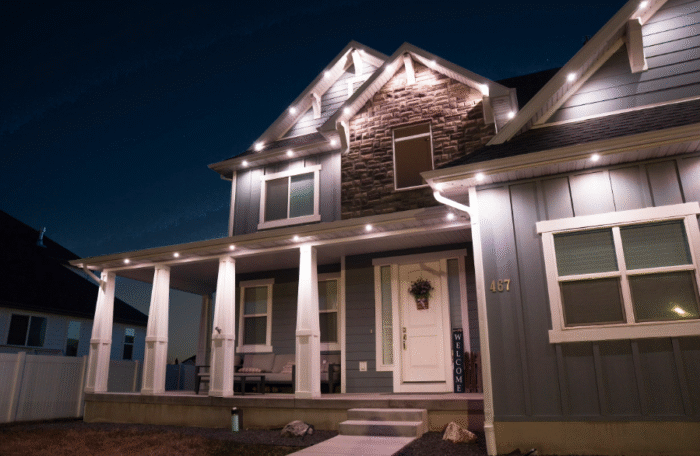
Most homes feature natural materials like brick, wood, and stone with earthy tones. These materials look best under warm white lighting between 2,500K and 2,700K. This temperature range brings out the natural warmth in architectural elements and creates a welcoming ambiance. Nashville lighting professionals report that 2,700K to 3,000K works for 85% of residential exteriors.
Cooler temperatures (4,000K-5,000K) produce a bluish-white light that works for security applications but makes homes look cold and uninviting. A 2024 Memphis lighting study showed that homes with mismatched color temperatures—mixing 2,700K and 5,000K outdoor eaves lights—reduced perceived property value by showing visual discord.
Coordinating Outdoor Eave Lights with Landscape Lighting
Plant lighting requires different treatment. Landscape lighting typically uses 3,000K to 4,000K to make vegetation appear natural and vibrant. When combining eave lights with landscape fixtures, keep architectural lighting at 2,500K-2,700K and garden lights at 3,000K-3,500K for balanced illumination.
The bigger problem involves low-quality LED bulbs that shift color temperature over time. Cheap fixtures may start at 2,700K but drift toward 3,500K or higher within 12-18 months, creating an inconsistent appearance across your home’s exterior.
Cost impact: Quality LED fixtures with stable color rendering cost $20-$40 more per unit than budget options. However, replacing an entire system due to color shift runs $1,200-$2,400 for a typical 15-fixture installation.
Mistake #3: Over-Illuminating with Outdoor Eave Lights and Creating the “Spaceship Effect”
Excessive brightness transforms your home’s exterior into what lighting professionals call the “spaceship effect”—bright, glaring pools of light that overpower architectural features.
Optimal Brightness Levels for Outdoor Eave Lights
This mistake stems from choosing fixtures with lumen outputs far exceeding what the space requires. Many homeowners install 1,000-lumen fixtures thinking more light equals better security. The result? Harsh bright spots on walls, washed-out architectural details, and uncomfortable glare that neighbors complain about.
Professional landscape designers target 600-800 lumens for standard residential under eaves lighting. This provides adequate illumination without overwhelming the senses. The key lies in understanding that eave lighting requires significantly less brightness than most people assume, especially when spread across multiple fixtures.
Avoiding the Spaceship Effect with Outdoor Eave Lights
The stark contrast between dark soffits and bright wall areas reinforces the spaceship effect. When soffit lights beam down intensely, they leave the actual soffit and fascia dark while creating aggressive spotlights on walls. This unnatural lighting pattern makes roof lines appear to float above the structure.
Adding dimmer controls solves over-illumination issues for outdoor eave lights. Many over-bright installations work perfectly when reduced to 40-50% intensity. Smart home integration allows homeowners to adjust brightness based on time of day or specific occasions.
Cost impact: Replacing over-bright fixtures with appropriately rated alternatives costs $150-$250 per fixture including installation. For 12 lights, expect $1,800-$3,000. Installing dimmer controls after the fact adds $400-$800 to any lighting system.
Mistake #4: Ignoring Architectural Symmetry When Installing Outdoor Eave Lights
Placing outdoor eaves lights without considering windows, doors, and architectural features creates visually jarring patterns.
Planning Outdoor Eave Lights Around Architectural Features
Professional installers plan eave lighting around structural elements, not despite them. Lights positioned directly above windows create odd shadows and waste illumination. The proper approach centers fixtures between windows or places them to highlight specific architectural features like columns or stone accents.
Symmetry matters enormously in residential lighting. A common error involves using mathematical spacing (every 8 feet) regardless of window positions. This results in some lights landing awkwardly above window frames while others sit in perfect locations. The human eye notices this irregularity immediately, making even expensive installations look amateur.
Framing Entrances with Outdoor Eave Lights
For homes with prominent entrances, lighting should frame the doorway rather than compete with it. Two fixtures flanking an entry door at equal distances create balance. Adding a third centered light above the door works only if the entrance design calls for emphasis.
Addressing Gable Lighting Challenges with Outdoor Eave Lights
Gable lighting presents another challenge. Because outdoor led eave lights mount on soffit undersides, they fail to illuminate gable peaks—the triangular sections where roof pitches meet. Homes without gable lighting lose architectural scale and appear “cut off” above the first story. Ground-mounted uplighting typically handles gables more effectively than soffit-mounted fixtures.
Cost impact: Repositioning lights to correct symmetry issues requires cutting new soffit holes and patching old ones. This costs $80-$120 per fixture moved, totaling $960-$1,440 for relocating 12 lights, plus exterior touch-up painting.
Mistake #5: Using Wrong Fixture Types for Outdoor Eave Lights or Indoor-Rated Products
Installing improper fixtures for outdoor conditions leads to premature failure and safety hazards.
Selecting Proper Outdoor-Rated Fixtures for Eave Lights
Many DIY installers purchase indoor recessed lights for exterior soffits, not understanding the critical difference. Outdoor fixtures need IP44 protection rating minimum, ensuring they withstand dust and water droplets. Indoor fixtures lack proper sealing and degrade rapidly when exposed to temperature fluctuations, moisture, and outdoor conditions.
Choosing the Right Depth and Style for Outdoor Eave Lights
Fixture depth matters significantly in soffit installations. Standard 6-inch recessed cans often don’t fit shallow soffit depths, forcing homeowners to cut into roof structure. The solution involves shallow 4-inch housings or wafer-style fixtures specifically designed for limited mounting space. These specialized fixtures cost $30-$50 more per unit but install properly without compromising roof integrity.
Integrated LED fixtures versus traditional cans with E26 sockets present another decision point. Integrated units offer sleeker profiles and better weatherproofing. However, they require complete fixture replacement when LEDs eventually fail. Traditional sockets allow bulb replacement but create more potential moisture entry points.
Understanding Trim Options for Outdoor Eave Lights
Fixture trim selection impacts both appearance and function. Reflector trims concentrate light downward for wall washing. Eyeball trims allow angle adjustment but break visual symmetry if not all pointed identically. Baffle trims reduce glare but cut light output by 20-30%.
Cost impact: Replacing failed indoor-rated fixtures with proper outdoor units costs $120-$180 per fixture installed. For an entire system of 15 lights, expect $1,800-$2,700, plus soffit repair where water damage occurred.
Mistake #6: Inadequate Power and Wiring Planning for Outdoor Eave Lights
Electrical infrastructure mistakes create immediate safety risks and limit future expansion possibilities.
Low-Voltage vs. Line-Voltage Systems for under eave lighting
Low-voltage systems (12V DC) offer safety advantages and easier installation compared to line-voltage (120V AC) wiring. However, voltage drop becomes critical in low-voltage runs exceeding 100 feet. Undersized wire gauge causes lights farthest from the transformer to dim noticeably. Professional installations use 12-gauge wire even for low-voltage applications and run parallel “reinforcing” circuits every 100 feet to maintain consistent voltage.
Transformer Sizing for Outdoor Eave Lights
Transformer capacity must exceed total fixture wattage by 20% minimum. A common mistake involves calculating total wattage but choosing a transformer rated exactly at that number, leaving no overhead. When outdoor LED lights draw their startup current, undersized transformers trip or fail prematurely. A 300-watt system needs at least a 360-watt transformer.
Circuit Routing and Controls for Outdoor Eave Lights
Circuit routing through attics requires careful planning. Running wire through finished attics costs significantly more than installations with full attic access. Homes with complex roof lines may need multiple circuits from different access points, increasing installation difficulty and cost.
Installing photosensors or timers during initial setup saves money versus adding controls later. Dusk-to-dawn sensors automatically manage under eave lights without manual intervention, saving energy and ensuring consistent operation. Smart controls integrate with home automation systems but add $150-$300 to project costs.
Permits and Code Compliance for Outdoor Eave Lights
Local electrical codes vary significantly regarding outdoor lighting installation. Some jurisdictions require licensed electricians for any 120V work, while others allow homeowner installations. Permit requirements range from $50-$300 depending on location. Skipping proper permitting creates liability issues and complications during home sales.
Cost impact: Rewiring an installed system to correct voltage drop issues costs $600-$1,200 for a 15-fixture installation. Upgrading an undersized transformer adds $200-$400. Bringing unpermitted work up to code during home sale negotiations can delay closings and cost $1,500-$3,000.
Mistake #7: Neglecting Long-Term Maintenance Planning for Outdoor Eave Lights
Failing to plan for ongoing maintenance turns initially impressive lighting into an eyesore within 2-3 years.
Regular Cleaning and Maintenance of Outdoor Eave Lights
Soffit lights accumulate dirt, spider webs, and debris that block light output and create uneven illumination patterns. Most homeowners never consider how they’ll clean fixtures mounted 8-12 feet above ground. Professional maintenance requires ladder work twice annually, costing $150-$250 per visit. DIY cleaning needs proper equipment and safety measures.
Understanding LED Lifespan for Outdoor Eave Lights
Fixture lens hazing occurs when UV exposure degrades plastic or acrylic covers. This reduces light transmission by 30-40% over 5-7 years, making the entire system appear dimmer. Quality fixtures use UV-resistant materials that cost more initially but maintain clarity longer.
LED lifespan ratings (typically 25,000-50,000 hours) assume ideal conditions. Extreme temperatures, poor ventilation within fixture housings, and voltage fluctuations reduce actual service life significantly. Budget fixtures may fail within 3-5 years instead of the advertised 15-20 years.
Monitoring Soffit Condition Around Outdoor Eave Lights
Soffit material degradation around fixture cutouts requires monitoring. Water infiltration through poorly sealed installations causes wood rot in wooden soffits or discoloration in vinyl soffits. Regular inspection catches problems before they require extensive soffit replacement.
Smart home integration and app-based controls need periodic firmware updates. Outdated software leads to connectivity issues and limits functionality. Budget $50-$100 annually for professional system updates if you’re not tech-savvy.
Cost impact: Replacing an entire system of 15 fixtures due to neglected maintenance costs $2,500-$4,000. Annual professional maintenance ($300-$500) prevents this by catching issues early. Soffit repair from water damage adds $800-$2,000 to overall expenses.
Avoiding These Mistakes: A Professional Approach to Outdoor Eave Lights
Professional lighting designers eliminate costly errors through systematic planning and quality product selection.
Professional Design Process for Outdoor Eave Lights
The design process starts with photometric analysis—using manufacturer beam spread charts to calculate exact fixture placement for even illumination. This prevents spacing errors before installation begins. Designers typically charge $200-$500 for comprehensive lighting plans, but this investment prevents $2,000-$5,000 in correction costs.
Quality vs. Budget under eave lighting
Quality matters more than quantity in fixture selection. Professional-grade outdoor eave lights cost $100-$250 per unit versus $30-$60 for big-box store fixtures. The premium buys stable color temperature, proper weatherproofing, longer LED lifespan, and better beam control. Over 10 years, quality fixtures cost less due to reduced replacement frequency.
Installation Timing and Professional Help for Outdoor Eave Lights
Installation timing affects project success. Avoid installing under eaves lights during extreme weather. Temperature extremes make materials brittle and complicate wiring work. Spring and fall offer ideal conditions for both DIY and professional installations.
Working with licensed electricians ensures code compliance and proper safety measures. While DIY installation seems budget-friendly, electrical work carries real risks. Professional installation costs $50-$100 per hour but includes liability insurance and code-compliant work.
Testing Before Finalizing under eave lighting Installation
Testing before finalizing fixture positions prevents regret. Many professionals install fixtures temporarily, evaluate the lighting effect at night, make adjustments, and then complete permanent installation. This extra step catches problems while fixes remain simple and inexpensive.
Making the Right Investment in Outdoor Eave Lights
Under eave lighting significantly enhances home exteriors when executed properly, providing security, highlighting architecture, and extending outdoor living hours.
Budget vs. Quality Installation for Outdoor Eave Lights
The price difference between budget and quality installations seems substantial initially. A basic DIY system costs $800-$1,500, while professional installation with premium fixtures runs $3,500-$6,000. However, factoring in mistake corrections, premature replacement, and wasted energy makes quality installation the economical long-term choice.
Key Specifications for Outdoor Eave Lights
Homeowners should request detailed quotes showing fixture specifications, not just brand names. Key specifications include Kelvin rating, lumen output, CRI (color rendering index), IP rating, and warranty terms. These details predict system performance and longevity better than fixture appearance.
Phased Installation Strategy for Outdoor Eave Lights
Start with critical areas rather than attempting full-home coverage immediately. Front entrance lighting delivers maximum impact per dollar invested. Add sections as budget allows while maintaining consistent fixture selection for visual continuity.
ROI and Resale Value of Outdoor Eave Lights
Consider the resale value impact. Professional outdoor lighting typically returns 50-80% of installation cost in increased home value. This makes quality installation a genuine investment rather than mere expense.
Energy Costs and Efficiency of Outdoor Eave Lights
Energy costs remain minimal with LED technology. A 15-fixture system using 10-watt LED bulbs costs approximately $32 annually when operating 6 hours nightly at $0.12/kWh. Poor fixture selection might double this, but energy costs remain secondary to installation quality.
Durability Considerations for under eave lighting
Weather-resistant fixtures matter more than energy efficiency in outdoor applications. A fixture rated for 50,000 hours but failing after 5 years due to moisture damage provides less value than a 25,000-hour fixture lasting 15 years.
Testing and Documentation for Outdoor Eave Lights
Test installations before committing to expensive systems. Purchase 2-3 fixtures in your preferred specifications and install them temporarily. Evaluate beam spread, color temperature, and brightness for several weeks before ordering the full system.
Warranty coverage varies dramatically between manufacturers. Budget fixtures offer 1-2 year warranties while premium products include 5-10 year coverage. This difference signals manufacturer confidence in product durability and longevity.
Professional installation includes considerations DIYers often miss: attic access routes, joist location techniques, voltage drop calculations, and weatherproofing best practices. These details separate attractive installations from problematic ones.
Documentation matters for future service. Photograph wire routing, note transformer locations, and keep fixture specifications accessible. This information proves invaluable when troubleshooting issues or planning additions years after installation.
Outdoor eave lighting transforms homes when planned carefully and executed properly, avoiding the seven costly mistakes that plague many installations.
Frequently Asked Questions About Outdoor Eave Lights
How much does it cost to install outdoor eave lights?
Professional outdoor eave lights installation typically ranges from $2,000 to $6,000 for a complete system, depending on home size and fixture quality. DIY installations cost $800-$1,500 for materials, but mistakes can add $2,000-$5,000 in correction costs. Quality installations with professional-grade fixtures ($100-$250 per unit) provide better long-term value than budget options.
What is the best spacing for outdoor eave lights?
Standard spacing for outdoor eave lights is 6 to 8 feet apart for most residential applications. For 8-foot eaves, place fixtures approximately 6 feet apart; increase to 8 feet for 9-foot eaves. The first fixture should be positioned at half the standard spacing distance from corners. Always adjust spacing to accommodate windows and architectural features rather than using rigid mathematical intervals.
What color temperature should I choose for outdoor eave lights?
For most residential exteriors, outdoor eave lights should use warm white lighting between 2,500K and 2,700K. This temperature range complements natural materials like brick, wood, and stone, creating a welcoming ambiance. Avoid cooler temperatures (4,000K-5,000K) unless specifically needed for security applications, as they make homes look cold and uninviting.
How many lumens do I need for outdoor eave lights?
Professional landscape designers recommend 600-800 lumens per fixture for standard residential outdoor eave lights. This provides adequate illumination without creating the harsh “spaceship effect” of over-bright installations. Avoid 1,000+ lumen fixtures unless you plan to use dimmer controls to reduce intensity to 40-50% for normal operation.
Can I use indoor recessed lights for outdoor eave lights?
No, never use indoor recessed lights forunder eave lighting. Outdoor fixtures require a minimum IP44 protection rating to withstand dust and moisture. Indoor fixtures lack proper sealing and degrade rapidly when exposed to outdoor conditions, leading to premature failure, safety hazards, and costly replacements within a few years.
Should I choose low-voltage or line-voltage for outdoor eave lights?
Low-voltage (12V DC) under eave lighting offer easier DIY installation and better safety, but require careful planning for runs exceeding 100 feet to prevent voltage drop. Line-voltage (120V AC) systems provide consistent power over longer distances but typically require licensed electrician installation. For most residential applications under 100 feet, low-voltage systems work well with proper 12-gauge wiring and adequately sized transformers.
How long do LED outdoor eave lights last?
Quality LED outdoor eave lights are rated for 25,000-50,000 hours under ideal conditions, potentially lasting 15-20 years. However, extreme temperatures, poor ventilation, and voltage fluctuations significantly reduce actual lifespan. Budget fixtures may fail within 3-5 years, while professional-grade fixtures with proper weatherproofing typically last 10-15 years in real-world conditions.
Do outdoor eave lights require maintenance?
Yes, under eave lighting require maintenance twice annually to maintain optimal performance. Regular cleaning removes dirt, spider webs, and debris that block light output. Professional maintenance costs $150-$250 per visit, while DIY maintenance requires safe ladder access and proper cleaning techniques. Annual professional maintenance ($300-$500) prevents costly system replacement and catches water damage early.
Will outdoor eave lights increase my home’s value?
Professional outdoor eave lights typically return 50-80% of installation cost in increased home value. Quality lighting enhances curb appeal, provides security benefits, and demonstrates well-maintained property. The investment pays off both in resale value and improved enjoyment of outdoor spaces during ownership.
What’s the difference between integrated LED and replaceable bulb outdoor eave lights?
Integrated LED outdoor eave lights offer sleeker profiles, better weatherproofing, and fewer potential moisture entry points. However, they require complete fixture replacement when LEDs fail. Replaceable bulb fixtures (E26 sockets) allow easy bulb replacement and flexibility to change color temperature or brightness, but create more weatherproofing challenges. For outdoor applications, integrated LEDs generally provide better long-term durability.