Edison Light Bulb String Lights DIY Outdoor: No Sag, No Stress—Just Warm Backyard Magic
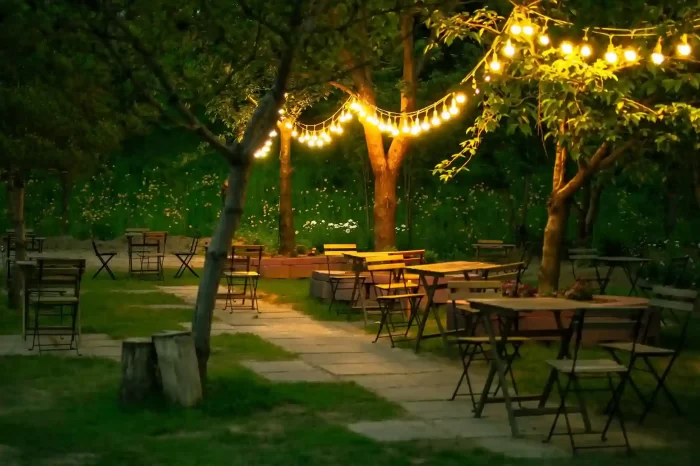
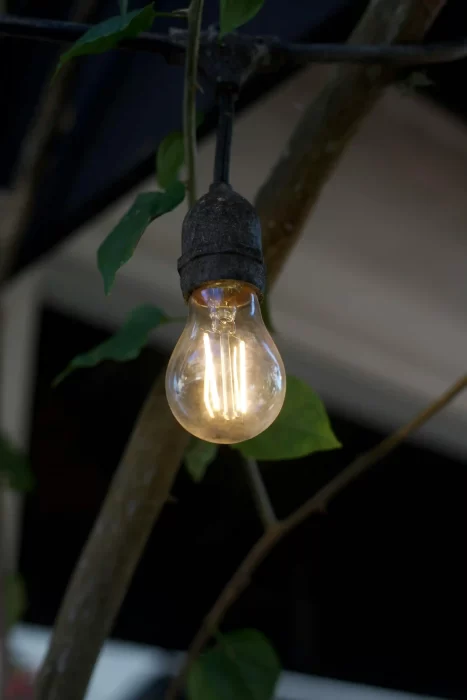
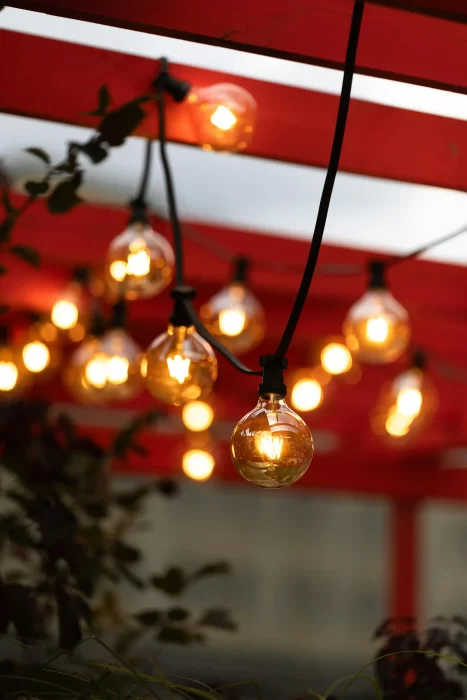
Edison Light Bulb String Lights in a backyard garden
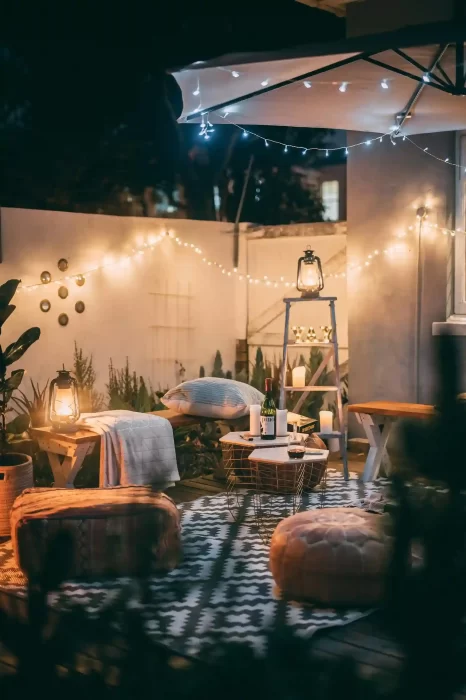
Edison Light Bulb String Lights outdoor installations transform patios and backyards into inviting evening spaces. To keep Edison Light Bulb String Lights from sagging all season, you need a real support system—typically a guy wire or guide cable—so the sockets aren’t carrying the load. Most successful DIY installations combine commercial-grade weatherproof lights with tension wire systems and strategic mounting points spaced 15-25 feet apart.Done right, Edison Light Bulb String Lights stay taut, safe, and photo-ready—without turning every windy night into a re-tightening project.
Understanding Edison Light Bulb String Lights Systems
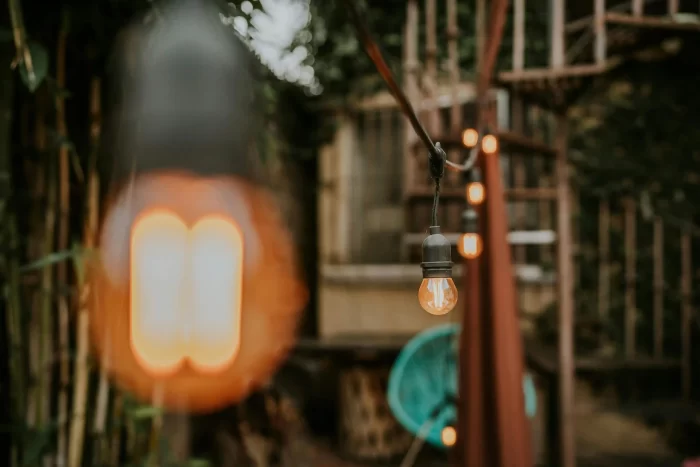
Edison Filament Bulbs: The Signature Look Behind Edison Bulb String Lights
Edison Light Bulb String Lights are defined by exposed “filament-style” bulbs in clear glass, built to deliver a 2200K–2700K warm amber glow more than raw brightness.
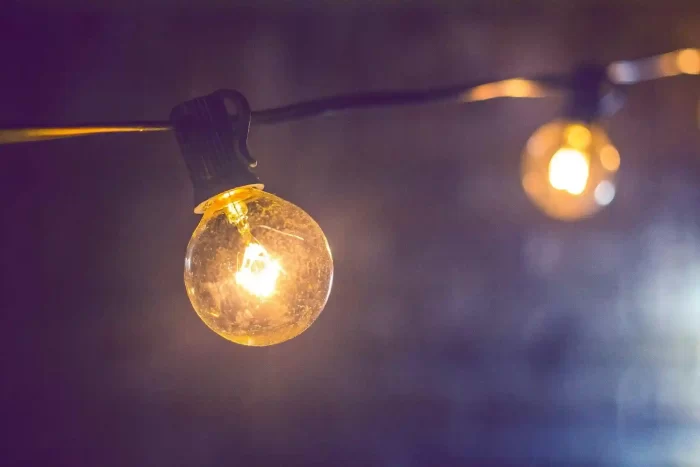
Warm amber glow from Edison filament-style bulbs
Modern LED Edison bulbs consume 1-6 watts per bulb compared to traditional 25-40 watt incandescent versions. Most outdoor-rated edison bulb string lights include E26 medium-base sockets with weatherproof seals rated IP44 or higher for moisture protection.
The commercial-grade versions use 18-gauge rubber-coated cable that supports the bulb weight better than residential 20-22 gauge wire. This gauge difference matters significantly for installations spanning more than 25 feet.
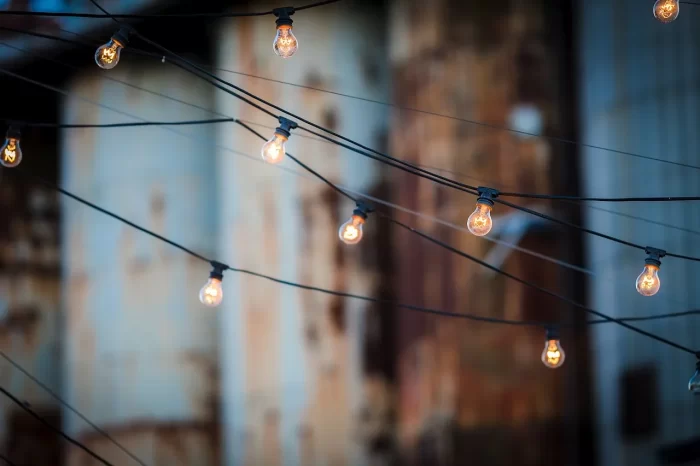
Common Outdoor Edison String Lights Challenges (Sagging, Moisture, Breakage)
For Edison Light Bulb String Lights, the three headaches are almost always the same: sagging when there’s no real support, moisture-related socket issues, and broken bulbs during install. Research shows 68% of failed outdoor string light installations result from inadequate structural planning rather than product defects.
Weight becomes critical in longer runs. A 50-foot edison bulb outdoor string lights strand with 25 bulbs weighs approximately 8-12 pounds. Without proper support, this creates 15+ pounds of tension at mounting points—enough to pull down gutters or bend lightweight posts.
Bulb weight adds tension without a support cable
Temperature fluctuations cause cable expansion and contraction. A 50-foot cable can stretch or contract up to 2 inches between summer and winter temperatures, creating slack that compounds sagging problems.
Planning Your Edison Light Installation
Measuring & Layout Strategy for Patio Edison Light Bulb String Lights
Start by mapping your space with rope or string to visualize the light pattern. Mark attachment points with tape and measure actual distances—not estimates. This prevents the common mistake of buying insufficient length or having awkward excess cable.
Plan the patio layout before installing Edison string lights
For patio edison bulb string lights, plan for bulbs to hang 7-9 feet above ground level. This height provides adequate clearance while maintaining intimate ambiance. Lower installations (6-7 feet) work for covered areas but create head-clearance issues in open spaces.
Calculate total string length by measuring your layout path and adding 15-20% for natural draping between supports. A straight 40-foot run typically requires 46-48 feet of actual string length to account for the gentle curve between mounting points.
Choosing Commercial-Grade Edison Bulb String Lights (18-Gauge, IP-Rated, UL)
Commercial-grade edison string lights outdoor specifications matter more than brand names. Look for these markers: 18-gauge wire minimum, weatherproof sockets with rubber gaskets, IP65 rating for full water resistance, and UL listing for outdoor use.
Weatherproof E26 sockets for outdoor Edison string lights
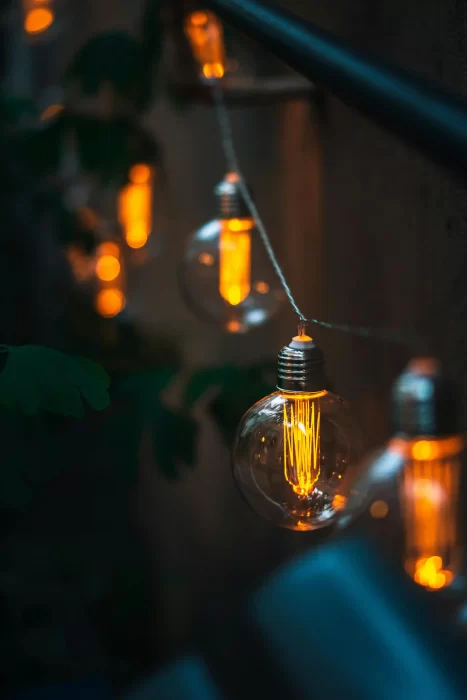
LED edison string light bulbs outlast incandescent versions by 15,000-20,000 hours. While traditional filament bulbs create authentic vintage aesthetics, LED versions with filament-style lighting elements provide similar appearance with better durability and energy efficiency.
String spacing between bulbs affects both appearance and coverage. Most vintage edison bulb string lights offer 12-24 inch socket spacing. Closer spacing (12-15 inches) creates a denser light canopy ideal for dining areas, while wider spacing (18-24 inches) suits perimeter lighting.
Connectivity options determine maximum installation size. Quality outdoor string lights with edison bulbs allow connecting 3-10 strands end-to-end. Check manufacturer specifications for maximum combined wattage—typically 15-20 amps on standard residential circuits.
Power Options for Outdoor Edison Bulb String Lights: GFCI, Timer, Smart Plug
GFCI-protected outdoor outlets are non-negotiable for edison bulb string lights outdoor installations. These outlets automatically cut power if they detect moisture contact, preventing electrical hazards and potential fires.
Position your installation start point near power sources to minimize extension cord use. If extension cords are necessary, use only outdoor-rated 14-gauge or heavier cables. Standard indoor extension cords deteriorate rapidly under UV exposure and moisture.
Consider timer switches or smart plugs for automatic on/off control. Most users run patio lights for 4-6 hours nightly, and automation prevents both forgetting to turn lights off and the inconvenience of manual switches.
Solar-powered edison bulb string lights eliminate wiring concerns but provide limited burn time (5-6 hours after full charge) and lower brightness. They work best as accent lighting rather than primary illumination.
The Guy Wire Support System for Edison Light Bulb String Lights
Why Guy Wires Prevent Sagging
Guide wires (also called guy wires or tension cables) carry the weight load that would otherwise stress the string lights edison bulbs themselves. This separation of structural load from electrical components extends light lifespan significantly.
Taut guide wire keeps Edison Light Bulb String Lights from sagging
Galvanized steel cable rated 1/16 to 1/8 inch diameter handles most residential applications. The 1/16-inch (1.5mm) thickness supports up to 250 pounds when properly tensioned, far exceeding requirements for typical patio installations.
Vinyl-coated guide wire options blend into backgrounds better than bare steel. Black coating suits most applications, while silver-gray or white coatings match specific aesthetic requirements. The coating also protects against rust in coastal or high-humidity environments.
Install a Tension Cable for Edison Light Bulb String Lights (Turnbuckle Setup)
Mount eye bolts or heavy-duty hooks at support structures first. For masonry installations (brick, concrete), use 1/4-inch lag shields with matching eye bolts. Wood structures require 3-4 inch lag bolts or heavy-duty screw eyes rated for outdoor use.
Test mounting point strength before proceeding. Each support should withstand 25-30 pounds of pull force—approximately three times the expected load. Weak mounting points will fail gradually over weeks as repeated tension stress loosens fasteners.
Thread steel cable through mounted eye bolts, securing one end with cable clamps (also called wire rope clips). Leave the opposite end loose for adjustment using a turnbuckle. Turnbuckles allow precise tensioning without re-doing cable connections.
Proper tension creates a firm, straight line with minimal vertical movement when pressed. Over-tensioning stresses mounting points unnecessarily; under-tensioning allows wind-induced swaying that fatigues both cable and mounting hardware.
For spans exceeding 40 feet, install intermediate support posts every 20-25 feet. These reduce total system weight on end supports and minimize cable sag in the middle sections.
Attaching Lights to Guy Wires
Black zip ties provide the cleanest attachment method for edison bulb string lights to support cables. Thread zip ties through the small eyelet at each socket’s top, loop around the guide wire, and snip excess tails flush for a finished appearance.
Attach sockets to the guy wire with zip ties
Space zip tie attachments at every socket location—typically every 12-24 inches depending on bulb spacing. Consistent attachment prevents sections of light cord from sagging between support points.
Remove all edison light bulbs before attaching strings to guide wires. This prevents bulb breakage during installation and makes the cord more flexible for handling. The two-person installation method—one person attaching sockets while another installs bulbs just behind—saves significant ladder time.
Hook-style cable hangers offer alternative attachment for heavier commercial edison bulb string lights. These S-hooks or hanging loops provide sturdier support than zip ties for installations using large G40 or G50 globe bulbs.
Mounting Points and Support Structures
Using Existing Architecture
House fascia and soffits work as mounting surfaces when structurally sound. Attach eye bolts or hooks to fascia boards behind gutters, not to gutters themselves. Gutters aren’t designed for lateral pulling forces and will deform over time.
Roof eaves provide strong mounting options if you can access rafter tails. Lag bolts threaded into rafter ends handle significant loads. Avoid attaching to only siding or trim—these decorative elements lack structural integrity for light support.
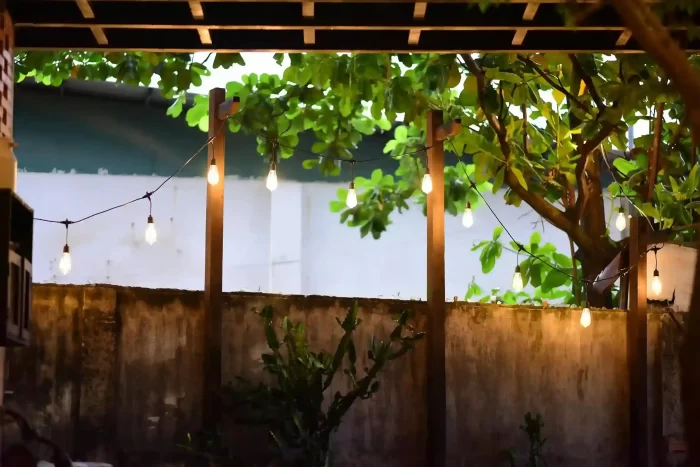
Pergolas and covered patios offer ideal support for indoor edison bulb string lights styles outdoors. Overhead beams already designed for structural loads easily accommodate additional light fixtures. Attach hooks to beam sides rather than bottoms to improve weather resistance.
Fencing works for perimeter lighting but requires assessment first. Privacy fences with 4×4 posts handle mounting loads well; lightweight chain-link or vinyl fencing needs supplemental posts specifically for lights.
Installing Dedicated Support Posts
Wood posts (4×4 pressure-treated minimum) installed 2-3 feet deep in concrete provide stable, independent mounting points. This approach works best when existing structures can’t support additional loads or don’t align with desired light placement.
Set posts with 60-pound bags of concrete mix per hole for permanent installations. Post height above ground should be 8-10 feet for overhead lighting patterns, adjusted based on desired bulb height minus 6-12 inches for hanging distance.
Metal shepherd’s hooks (5-foot or taller) offer temporary solutions for seasonal edison string lights installations. Select commercial-grade hooks with ground anchors rather than consumer versions that wobble in soft soil.
Planter-based posts work for renters or temporary setups. Use heavy planters (minimum 20 gallons) filled with concrete or compacted gravel. Brace posts with diagonal supports if planter-based systems show movement.
Electrical Safety and Connections
Proper Outdoor Wiring
Match electrical loads to circuit capacity before installation. Standard 15-amp household circuits support approximately 1,800 watts total. Most LED edison bulb string lights outdoor sets use 25-50 watts per string, allowing multiple strand connections safely.
Calculate your total wattage: (number of bulbs) × (watts per bulb) = total watts. Example: 50 bulbs × 2 watts each = 100 watts total—well within safe limits. Always leave 20% capacity margin for safety and code compliance.
Use weatherproof wire connectors for any splices. Standard wire nuts deteriorate outdoors even under covers. Marine-grade heat-shrink connectors or filled splice caps provide better moisture protection.
Extension cord connections should be suspended off ground level to prevent water pooling. Tape connections with self-fusing silicone tape (not electrical tape, which degrades outdoors) or use weatherproof cord connection covers.
Testing Before Full Installation
Plug in and test every light strand before hanging. Identifying faulty bulbs or wiring issues at ground level saves enormous frustration compared to troubleshooting from ladders after installation.
Check inline fuses located in plug housings. Many outdoor string lights with edison bulbs include 3-5 amp fuses that blow if overloaded. Keep spare fuses matching original amperage ratings—never substitute higher-rated fuses, which create fire hazards.
Verify bulbs seat fully in sockets. Loose bulbs cause intermittent connections, accelerated wear, and potential water infiltration into sockets. Each bulb should screw in smoothly and firmly without excessive force.
Test GFCI outlet function by pressing the “test” button—power should cut immediately, then restore when you press “reset.” Faulty GFCI outlets must be replaced before connecting lights.
Installation Process Step-by-Step
Phase One: Support Infrastructure
Install all mounting hardware first: eye bolts, hooks, posts, or brackets. This establishes your structural framework before introducing electrical components.
String guide wires between mounting points, leaving one end adjustable via turnbuckle. Initial tension should create a straight line with minimal sag—you’ll fine-tune tension after lights are attached.
Mark guide wire locations at regular intervals where lights will attach. This helps maintain consistent spacing during light installation.
Walk your layout checking for obstacles: tree branches, roof lines, antenna, or other hazards that might interfere with strings or create abrasion points.
Phase Two: Hanging the Lights
Start at the end nearest your power source. Secure the first socket to guide wire with zip ties, ensuring it stays positioned away from the structure to prevent bulb contact with walls or surfaces.
Work along the guide wire, attaching each socket with zip ties. Maintain consistent spacing and keep cord taught between attachment points. Loose cord between supports creates the droopy, unprofessional appearance most installations try to avoid.
For longer runs, position a ladder centrally and attach multiple sockets before moving. This reduces ladder repositioning frequency and speeds installation significantly.
Leave bulbs out during initial hanging. Once entire string is secured to guide wire, install bulbs working along the strand. Two people make this faster: one on the ladder installing bulbs, another on the ground handing up bulbs and moving the ladder.
Phase Three: Final Adjustments
Adjust turnbuckles to achieve desired tension. The guide wire should show minimal movement when lightly pressed. Lights themselves will hang slightly below the guide wire—plan for this 4-6 inch drop when setting initial wire height.
Step back and check overall appearance from multiple viewing angles. Uneven sections or visible slack often result from inconsistent spacing between zip tie attachments. Add extra zip ties where needed to eliminate noticeable sag.
Finished backyard lighting after final tension adjustments
Test the complete installation after dark to identify any dark spots, burned-out bulbs, or uneven lighting. Mark problem areas for adjustment rather than trying to fix them immediately in darkness.
Trim all excess zip tie tails flush for clean appearance. Protruding zip tie ends catch on leaves, create shadows, and look unfinished.
Maintenance and Troubleshooting
Seasonal Care Requirements
Inspect installations monthly for loose connections, damaged bulbs, or wire degradation. Catch issues early before they escalate to complete strand failures.
Clean bulbs and sockets twice yearly with dry cloth. Dust and debris accumulation reduces light output and can trap moisture, accelerating socket corrosion.
Re-tension guide wires before summer and winter. Temperature changes affect cable tension—what’s perfect in spring may need adjustment by fall.
Store spare bulbs matching your installation. Bulb styles change frequently, and finding exact replacements for vintage edison bulb string lights becomes difficult years after purchase.
Common Problems and Solutions
Single bulb failure: Unscrew dead bulb and inspect socket contact tab. If flattened, carefully pry upward with plastic tool (never metal, which can short the socket). Replace bulb and test.
Half strand dark: Check for blown fuse in plug housing. Replace with identical amperage fuse only. If problem repeats, check for damaged bulb sockets or frayed wiring causing shorts.
Entire strand dead: Test outlet with different device. Check all connections for moisture infiltration. Inspect inline fuses. If everything tests good but lights still fail, internal wiring may be damaged—replace the strand.
Progressive sagging: Indicates guide wire loosening or mounting point weakness. Re-tension turnbuckles and inspect mounting hardware for pull-out or bending. Add supplemental support posts if necessary.
Socket corrosion: Clean with contact cleaner spray and cotton swabs. Apply dielectric grease to socket threads before reinstalling bulbs. This prevents future corrosion in humid climates.
Winter Storage vs. Year-Round Use
Commercial-grade edison bulb outdoor string lights withstand winter weather when properly installed. LED versions perform better in cold temperatures than incandescent bulbs, which can shatter in extreme cold.
If removing lights seasonally, label strands clearly before storage. Note strand length, bulb type, and any quirks (loose socket, requires jiggling plug, etc.) for easier reinstallation.
Coil strands loosely around cardboard or plastic reels to prevent wire kinking. Store in sealed plastic bins with dessicant packets to control humidity.
Clean all components before storage. Dirt and moisture trapped during storage promote corrosion that causes failures when lights are reinstalled.
Design Patterns and Configurations
Overhead Canopy Patterns
Parallel line patterns create organized, geometric lighting ideal for dining areas. Space lines 4-6 feet apart for even coverage. This pattern uses more mounting points but provides superior light distribution.
Overhead canopy pattern with Edison bulb string lights
Zigzag or crisscross patterns add visual interest while maintaining good coverage. Start from corners and work toward center, alternating line angles. This approach typically requires fewer mounting points than parallel patterns.
Perimeter lighting following patio edges defines space boundaries and provides ambient lighting without overhead fixtures. Mount lights 8-10 feet high along fence lines or on posts positioned at patio corners.
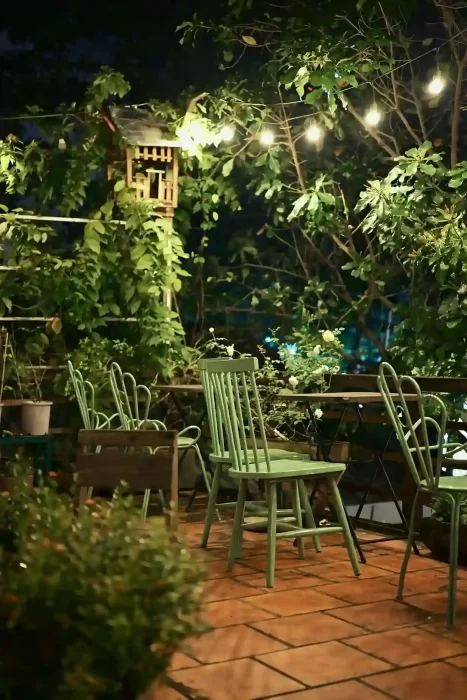
Perimeter lighting for an outdoor dining patio with Edison bulbs
Starburst patterns radiating from central points create dramatic focal areas. Use lightweight steel cable as supports radiating from a central post or tree branch. This works best for smaller areas (under 20 feet diameter).
Accent and Feature Lighting
Wrap posts, columns, or trees with string lights in loose spirals. Start at base and work upward, spacing wraps 8-12 inches apart. Secure with zip ties or weatherproof twist ties rather than nails that damage wood.
Frame doorways, windows, or archways using outdoor edison bulb string lights for dimensional interest. Mount small hooks at 12-inch intervals around frames and drape lights across hooks.
Backlight landscaping features with ground-to-height string installations. Run lights up from ground-level posts behind plants or garden beds, creating silhouette effects after dark.
Curtain effects use vertical light strands hanging from horizontal support wires. Space vertical drops 12-18 inches apart for wall-of-light appearance. This creates privacy screening while adding illumination.
Frequently Asked Questions
How do I prevent my edison string lights from sagging outdoors?
Install galvanized steel guide wires between mounting points and attach lights to these support cables using zip ties. The guide wire carries structural weight while lights provide illumination. Proper tensioning with turnbuckles maintains straight lines, and mounting points should be spaced no more than 25 feet apart for optimal support.
What gauge wire is best for outdoor edison bulb installations?
Choose 18-gauge cord minimum for commercial-grade performance. This heavier wire supports bulb weight better than 20-22 gauge residential wire and handles electrical loads more efficiently. For support guide wires, 1/16-inch (1.5mm) galvanized steel cable handles most residential applications up to 40-foot spans.
Can I leave edison light bulb string lights outside year-round?
Yes, when using commercial-grade outdoor-rated lights with IP65 weatherproofing. LED versions perform better than incandescent in temperature extremes. Inspect connections quarterly and re-tension guide wires seasonally. Quality installations with proper support systems last 3-5 years in harsh Midwest climates and longer in moderate regions.
How many edison bulb string lights can I connect together?
Most manufacturers allow connecting 3-10 strands depending on bulb wattage and wire gauge. Calculate total wattage (bulbs × watts per bulb × number of strands) and keep below 80% of circuit capacity (1,440 watts on standard 15-amp circuits). LED edison string lights consume 1-6 watts per bulb allowing more connected strands than incandescent versions.