Backyard String Lighting: Step-by-Step Planning & Installation Guide
It’s 8 PM on a Saturday evening, your guests have just arrived, and your backyard transforms from a dark, unused space into a glowing outdoor retreat. The difference? A well-executed backyard string lighting setup that took just one afternoon to install. According to Statista’s 2024 outdoor living report, homeowners who incorporate string lighting into their outdoor spaces see a 47% increase in evening usage time—turning underutilized yards into functional extensions of their living areas. Whether you’re enhancing a cozy 200-square-foot patio or illuminating a sprawling backyard oasis, proper planning and methodical installation separate temporary party decorations from permanent outdoor lighting that performs year after year.
The Strategic Foundation: Why Planning Trumps Installation
Most backyard string lighting projects fail not during installation, but in the planning phase. The fundamental challenge isn’t technical complexity—it’s spatial strategy. A well-designed lighting plan addresses three core elements before a single hook touches wood: structural support assessment, electrical accessibility, and visual balance across your outdoor space.
Professional landscape lighting designers employ a specific evaluation process. Start by mapping anchor point candidates within your yard. Natural supports include mature trees with trunk diameters exceeding 8 inches, home fascia boards, fence posts, pergola beams, and deck railings. Each support type imposes different weight limits and installation requirements. Trees tolerate approximately 15-20 pounds per attachment point when using proper hardware, while treated fence posts typically support 8-12 pounds depending on wood condition and age.
The electrical infrastructure determines your lighting layout’s starting point. According to the National Electrical Code, outdoor outlets must feature GFCI (Ground Fault Circuit Interrupter) protection for safety. Survey your property to identify these weatherproof outlets, noting their locations on your sketch. Most string light projects require outlets within 50 feet of the farthest light
strand to avoid excessive voltage drop. If your existing outlet configuration doesn’t align with your desired lighting pattern, budget for either outdoor-rated extension cords (14-gauge minimum for runs exceeding 25 feet) or professional electrical work to add new outlets.
Visual balance emerges from understanding sightlines. Stand in positions where you’ll frequently view the backyard—through kitchen windows, from your back door, seated on the patio. Lights should create depth and dimension without overwhelming the space or creating harsh shadows. Forrester Research’s 2025 outdoor design study identified that backyard string lighting installations rated “most successful” by homeowners featured 12-15 foot minimum clearance height and avoided direct eye-level placement that produces glare.
Pre-Installation Planning: The Measurement Framework
Precise measurements eliminate the most common installation frustration: ordering insufficient cord length or purchasing excessive materials. Professional installers utilize a systematic measurement protocol that accounts for both horizontal spans and vertical drops.
Begin with your base sketch showing property boundaries, structures, and identified anchor points. Measure each planned light run from power source to terminus, recording distances in feet. Critical addition: the “swag allowance.” String lights perform best with 2-4 feet of slack between supports, creating gentle curves rather than taut, rigid lines. For a 20-foot span between two trees, order 24 feet of lights to achieve proper drape.
Calculate vertical requirements separately. If lights descend from a fascia board 10 feet high to connect at ground level outlet, add this vertical measurement to your total. Many novice installers underestimate corner transitions. When lights turn 90 degrees—such as traveling along a fence perimeter—measure the actual path lights will follow, not the straight-line distance.
A practical calculation example: Assume a rectangular patio measuring 16 by 20 feet. You plan a perimeter pattern with lights starting at an outlet on the home’s exterior wall. The calculation proceeds: 16 + 20 + 16 + 20 = 72 feet of perimeter, plus 8 feet of swag allowance (1 foot per corner × 4 corners + 4 feet distributed across runs) equals 80 feet minimum. Add 6 feet for the vertical drop from installation height to power source, yielding a total requirement of 86 feet. Order a 100-foot strand to provide installation flexibility and account for routing around obstacles.
Equipment & Materials Specifications
Backyard string lighting hardware divides into three categories: the lights themselves, mounting components, and electrical accessories. Each category demands specific consideration based on your installation parameters.
String Light Selection Criteria
LED technology dominates the contemporary outdoor lighting market for compelling reasons. Energy consumption sits at 10-15% of incandescent equivalents, with fixture lifespans exceeding 25,000 hours according to Department of Energy testing data. For backyard installations, prioritize these specifications: minimum IP65 weather resistance rating, shatterproof plastic bulbs (not glass), 16-18 gauge wire, and bulb spacing between 12-24 inches depending on desired light density.
Color temperature significantly impacts ambiance. Warm white options rated at 2700-3000 Kelvin produce the classic, inviting glow associated with outdoor entertaining spaces. Cool white temperatures above 4000K generate harsh, institutional aesthetics unsuitable for residential backyards. Smart-enabled string lights offer app-based control and scheduling features—useful if you want automated on/off cycles without manual intervention.
Mounting Hardware Essentials
Support method varies by surface material. For wood structures (deck posts, fence rails, tree trunks), cup hooks or eye bolts in 3/8-inch diameter provide adequate support. Pre-drill pilot holes using a bit one size smaller than your hardware to prevent wood splitting. Masonry and stucco surfaces require specialized anchors—plastic expansion anchors rated for outdoor use combined with corrosion-resistant screws.
For spans exceeding 20 feet or installations subject to wind exposure, integrate a guide wire system. Stainless steel cable (1/16 to 1/8-inch diameter) with vinyl coating resists weathering and supports light strings without visible sagging. Turnbuckles enable post-installation tension adjustments. Attach lights to the guide wire using zip ties or small cable clips spaced every 2-3 feet.
Freestanding installations without natural anchor points necessitate dedicated poles. Electrical metal tubing (EMT conduit) in 10-foot lengths provides an economical solution. Sink the bottom 24-30 inches into the ground using a post-hole digger, backfilling with quick-setting concrete for stability. Alternatively, position poles in large planters filled with concrete—allowing removal for seasonal storage but requiring substantial planter weight to prevent tipping.
Electrical Components
Outdoor-rated extension cords serve as the connection between lights and power sources when outlet proximity poses challenges. Select cords rated for wet locations (look for “W” in the designation—SJTW or similar), with 14-gauge wire for runs under 50 feet and 12-gauge for longer distances. Avoid daisy-chaining multiple extension cords, as this creates voltage drop and potential fire hazards.
Smart plugs or outdoor timers automate your lighting schedule. Weather-resistant models from manufacturers like GE or Kasa integrate with home automation systems, enabling voice control through Alexa or Google Home. Program lights to activate at sunset and deactivate at a specified hour, eliminating manual operation. These devices typically handle 1800-2000 watts—sufficient for most residential backyard string lighting installations spanning 200-300 feet of total cord length.
Installation Methods by Location Type
Different backyard configurations demand tailored installation approaches. The following protocols address the five most common scenarios, with step-by-step execution guidance.
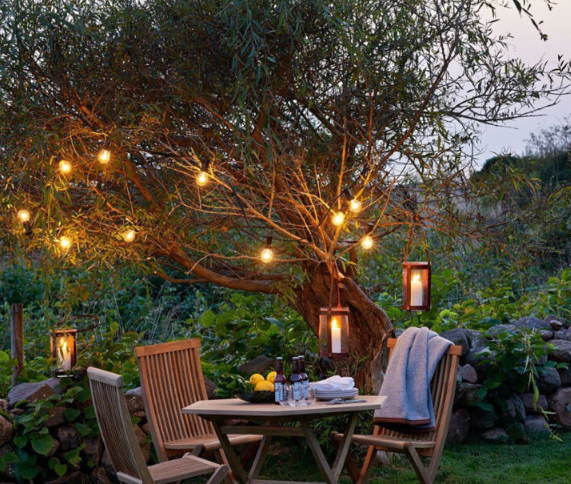
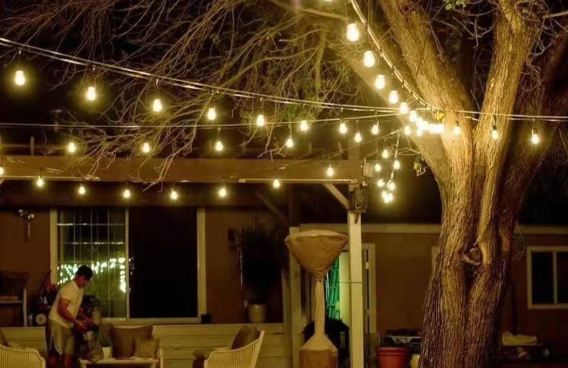
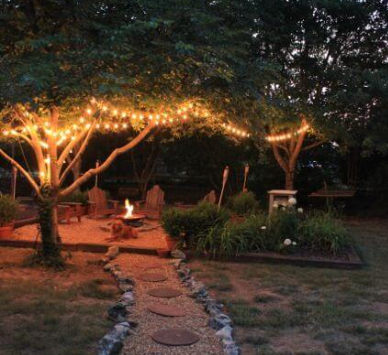
Tree-to-Tree Installation
Mature trees offer organic anchor points that create natural-looking lighting canopies. This method works ideally for yards with two or more trees positioned 15-40 feet apart.
Step 1: Anchor Point Identification Select attachment locations 7-12 feet above ground on tree trunks or major branches (minimum 6-inch diameter). Avoid areas with active new growth or thin bark susceptible to damage. Use a ladder to access attachment height safely—never climb trees while carrying tools or hardware.
Step 2: Hardware Installation For tree bark protection and long-term tree health, employ cup hooks or eye bolts with smooth, rounded edges. Pre-drill pilot holes 2-3 inches deep using a drill bit slightly smaller than your screw diameter. Thread hooks clockwise until firm resistance is felt, leaving approximately 1 inch of hook exposed for light attachment.
Step 3: Light Stringing Starting at the tree nearest your power source, loop the light strand’s plug end through the hook. Walk the strand to the second tree, maintaining tension to assess final position before securing. Attach at the second tree using the installed hook, adjusting strand tension to achieve desired swag (2-4 feet of sag is standard). Secure the strand to hooks using cable ties or light-specific clips at each tree.
Step 4: Connection and Testing Route extension cord from power outlet to starting tree, camouflaging cord along fence lines or beneath ground cover where possible. Connect lights and activate to verify all bulbs illuminate properly. Make tension adjustments as needed—lights should curve gracefully without excessive droop or rigid straight lines.
Fence Perimeter Installation
Fence-mounted string lights create defined boundaries and maximize yard illumination with minimal additional support structures.
- Hardware Spacing: Install cup hooks or small L-brackets every 4-6 feet along the top fence rail. Consistent spacing prevents sagging and maintains clean visual lines.
- Routing Strategy: Begin at the power source location, working methodically around the perimeter. At corners, allow 12-18 inches of extra cord to accommodate turns without pulling tension. Use cable clips to secure lights to fence posts at each corner.
- Height Consideration: Mount lights along the top rail of standard 6-foot privacy fences, or elevate using extension brackets if fences sit below ideal viewing height. Lights positioned at 7-8 feet provide comfortable clearance while delivering effective illumination.
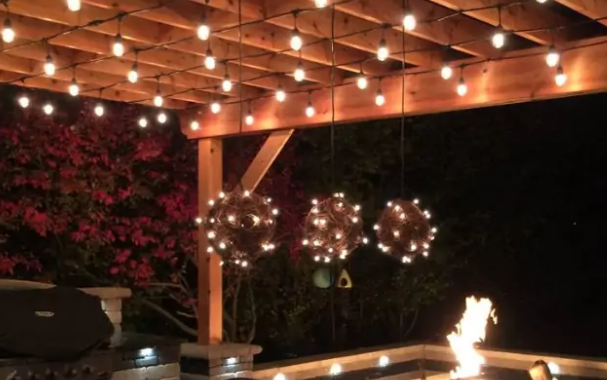
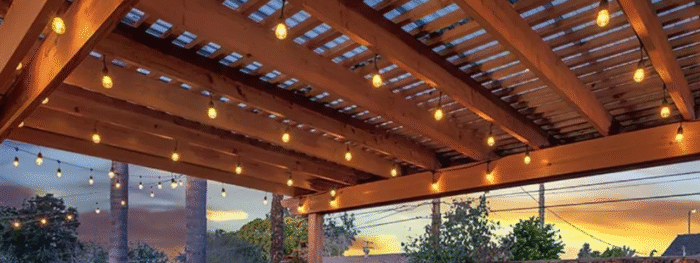
Covered Patio/Pergola Installation
Overhead structures simplify installation by providing ready-made frameworks for light attachment.
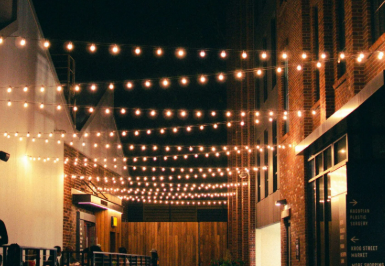
- Pattern Selection: Parallel runs create orderly, formal aesthetics. Zigzag patterns deliver casual, festive vibes. Crisscross arrangements maximize light distribution across dining areas. Choose based on your outdoor space’s primary function and style.
- Attachment Method: Screw eye hooks directly into pergola beams or patio ceiling joists (locate joists using a stud finder). Space hooks 4-6 feet apart depending on your selected pattern. For metal pergolas, use self-tapping screws designed for metal applications.
- Ceiling Fan Integration: If your covered patio includes ceiling fans, route lights around fan blades maintaining minimum 18-inch clearance. Never attach lights directly to fan fixtures or blades—vibration causes premature failure.
Deck Railing Installation
Decks without overhead structures benefit from rail-mounted lighting that defines space boundaries while providing ambient illumination.
Under-Rail Mounting: Fasten lights beneath the top railing using coaxial staples or rail-specific clips. This positioning conceals hardware and creates downward light cast across deck surfaces.
Post-to-Post Spans: Install small hooks on deck post tops, running lights in gentle swags between posts. Standard 6-8 foot post spacing accommodates attractive light curves without excessive sagging.
Staircase Lighting: When decks feature stairs, continue light strands along stair rails using clip-on fasteners. Maintain consistent height above each step for safety and visual continuity.
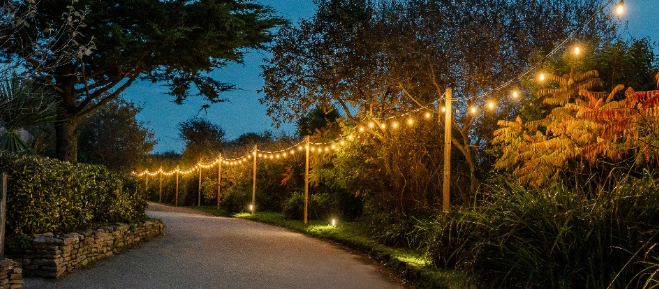
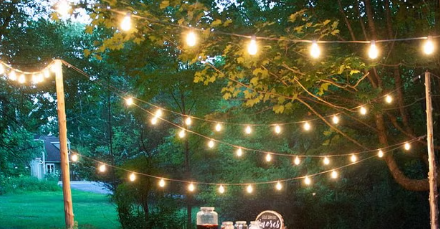
Freestanding Pole System
For yards lacking natural anchor points, freestanding poles deliver complete flexibility in light placement and configuration.
Pole Materials: 1/2-inch EMT conduit provides excellent durability at reasonable cost. Cut 10-foot lengths, allowing 2-3 feet for ground burial. Paint poles with outdoor spray enamel to prevent rust and customize appearance.
Foundation Options:
- Concrete bucket method: Fill 5-gallon buckets with quick-setting concrete, inserting poles in PVC pipe sleeves before concrete cures. Portable but heavy.
- Direct burial: Dig 24-30 inch holes using post-hole diggers, set poles vertically using a level, backfill with concrete. Permanent but most stable.
- Large planter method: Use 18-20 inch diameter planters filled with concrete mix and topped with decorative stone. Relocatable with equipment.
Attachment Hardware: Cap each pole with a threaded hook or install a horizontal eye bolt through the pole 6 inches from the top. This creates the anchor point for light strands.
Post-Installation Optimization
Installation completion marks the beginning of optimization. Fine-tuning adjustments separate adequate results from exceptional outdoor ambiance.
Tension Adjustment: After initial installation, observe light strands over 24-48 hours. Cord materials experience some stretching under sustained load. Tighten turnbuckles or repositioning hooks corrects excessive sagging. Aim for 6-10 inch sag midpoint between supports spanning 15-20 feet.
Light Distribution Assessment: Activate lights during evening hours to evaluate coverage. Dark spots indicate insufficient bulb density or poorly positioned strands. Add supplementary runs in targeted areas or adjust existing strand placement to fill gaps.
Cord Management: Visible power cords detract from finished aesthetics. Route cords along existing landscape features—beneath mulch, along fence bases, behind planters. Use landscape staples to secure cords flat against the ground in walking paths. Consider conduit runs for premium finished appearance in high-visibility areas.
Smart Control Programming: If using smart plugs or timers, refine activation schedules based on actual usage patterns. Many homeowners initially program lights for sunset-to-midnight operation, then adjust to more targeted windows matching their outdoor activity times. Seasonal schedule adjustments account for changing daylight patterns—lights activate earlier in winter months compared to summer.
Common Issues and Resolutions
Even properly installed backyard string lighting encounters occasional problems. Recognizing symptoms and applying appropriate fixes maintains consistent performance.
Bulb Outages: Individual bulb failures are inevitable over time. Most LED string lights feature series circuits where one failed bulb causes entire strand outage. Locate the dark bulb by visual inspection, then replace it with a spare (quality light sets include extras). Tighten all bulbs by quarter-turn to ensure proper socket contact—loose bulbs constitute the primary cause of intermittent operation.
Excessive Sagging: Strands that develop pronounced drooping between supports indicate either inadequate initial tension or hardware loosening. For spans under 25 feet without guide wires, tighten existing attachment points. For longer runs, retrofit a guide wire system using stainless steel cable, transferring light weight from direct mounting to the support wire.
Water Intrusion: Despite weatherproof ratings, electrical connections can develop moisture problems. Apply dielectric grease to all plug connections before assembly. If corrosion develops on plug prongs, clean thoroughly with fine sandpaper and apply fresh grease. Store vulnerable connection points (where strand plugs meet extension cords) in raised positions above ground level or protect with waterproof junction boxes.
Dimming or Flickering: Voltage drop manifests as dimmed bulbs, particularly those farthest from the power source. This results from excessive cord length, undersized wire gauge, or too many lights connected in series. Solutions include: reducing total string length on single circuit, upgrading to heavier gauge extension cords (12 vs 14 gauge), or adding a second circuit originating from a different outlet.
Wildlife Interference: In certain regions, squirrels, raccoons, or other animals may chew light cords. Apply bitter-tasting cable protection spray to cords, or install PVC conduit sleeves over vulnerable sections. Motion-activated deterrents (ultrasonic devices or sprinkler systems) protect larger installations.
Maintenance Protocol for Long-Term Performance
Seasonal maintenance rituals extend string light longevity and preserve installation quality. A minimal time investment delivers years of reliable operation.
Monthly Quick Checks (10 minutes): Walk the perimeter of your installation during evening hours. Verify all bulbs illuminate. Inspect visible hardware for loosening—wind and weather gradually work connections free. Tighten any hooks or clips showing movement. Check cord routing—confirm landscape staples remain secure and cords haven’t become tripping hazards.
Quarterly Deep Cleaning (30 minutes): Dust, pollen, and outdoor debris accumulate on bulbs and fixtures, reducing light output. Power down lights and unplug from outlets. Use a soft microfiber cloth dampened with mild soap solution to wipe each bulb and cord section. Avoid harsh chemicals that degrade plastic bulb materials. Rinse with clean water and allow complete drying before re-energizing.
Annual Comprehensive Inspection (1-2 hours): Once yearly, before peak outdoor season, conduct thorough system evaluation. Remove lights from mounting hardware. Test each strand independently at ground level to identify failing sections before reinstallation. Inspect all mounting hardware for corrosion—replace compromised hooks or clips. Check tree growth—attachments on living trees may require repositioning as trunks expand. Verify electrical connections remain moisture-free and electrically sound.
Seasonal Considerations: In regions experiencing harsh winter conditions, removing and storing string lights prevents weather damage. Carefully coil lights using the “over-under” technique (prevents tangling), place in labeled plastic bins with desiccant packets to control moisture, and store in climate-controlled spaces. Alternatively, commercial-grade lights rated for year-round installation can remain in place with quarterly checks for storm damage.
Decision Framework: DIY vs Professional Installation
Not every backyard string lighting project suits do-it-yourself execution. Understanding complexity thresholds helps homeowners make cost-effective decisions about when to call professionals.
Suitable for DIY: Straightforward installations with accessible anchor points, relatively short spans (under 50 feet total), existing power outlets within 25 feet of installation area, and single-level homes where all work occurs at ladder height. If you can safely access all installation points, possess basic hand tool proficiency, and feel comfortable working on ladders, DIY delivers significant cost savings. Material costs typically run $150-$400 depending on total light length and support system requirements.
Professional Installation Recommended: Complex scenarios involving roof mounting above single-story height, electrical work requiring new outlet installation, spans exceeding 100 feet requiring extensive guide wire systems, or commercial-grade permanent installations benefit from professional expertise. Licensed electricians ensure code compliance for electrical components. Professional installers carry liability insurance covering property damage. Expect professional installation costs from $500-$2,000 depending on scope, with materials typically additional.
Hybrid Approach: Some homeowners tackle basic installation while hiring electricians specifically for outlet additions or hardwired connections. This maximizes DIY cost savings while ensuring electrical safety. Discuss this option with local electricians—many offer targeted service calls for outdoor outlet installation (typically $200-$400 per outlet) without requiring full-service lighting installation contracts.
Budget Planning by Yard Size
Understanding total project costs enables realistic planning and prevents mid-project budget surprises. The following estimates reflect quality materials and DIY installation labor.

Small Patio (200-400 sq ft):
- LED string lights (50-75 feet): $75-$150
- Mounting hardware: $20-$40
- Extension cord/timer: $25-$50
- Total estimated: $120-$240
Medium Backyard (400-800 sq ft):
- LED string lights (100-150 feet): $150-$300
- Mounting hardware and guide wire: $50-$100
- Freestanding poles (if needed, 2-4 units): $100-$200
- Electrical accessories: $40-$75
- Total estimated: $340-$675
Large Property (800+ sq ft):
- LED string lights (200-300 feet): $300-$600
- Comprehensive hardware system: $100-$200
- Freestanding pole array (4-8 units): $200-$400
- Multiple circuits/smart controls: $75-$150
- Total estimated: $675-$1,350
Premium options (color-changing LED systems, smart home integration, commercial-grade fixtures) increase costs 30-50% above baseline estimates. Budget an additional 10-15% for unforeseen materials—replacement bulbs, extra hardware, specialized mounting solutions discovered during installation.
FAQ
How far apart should I space string lights for optimal illumination?
Bulb spacing between 12-18 inches provides adequate light density for most backyard applications. Closer spacing (8-12 inches) delivers higher light output suitable for task areas like outdoor kitchens or dining spaces. Wider spacing (24-30 inches) creates ambient mood lighting for lounge areas. Total lumens depend on bulb wattage and quantity—calculate approximately 50-75 lumens per bulb for typical LED string lights.
Can I leave outdoor string lights up year-round?
Commercial-grade LED string lights rated for permanent outdoor installation tolerate year-round exposure in most climates. Verify IP65 or higher weather resistance ratings. In regions experiencing severe winter weather (sustained temperatures below 10°F, heavy ice accumulation), seasonal removal prolongs fixture life. UV-resistant cord coatings prevent sun damage. Year-round installations require quarterly maintenance checks for loose connections and weather damage.
What’s the maximum safe length for connected string lights?
Manufacturer specifications vary, but general guidelines limit connected string light length to 250-300 feet per circuit. Exceeding this causes voltage drop, reducing bulb brightness at distant points and potentially creating fire hazards from overloaded circuits. For larger installations, establish multiple independent circuits from separate outlets. Professional installations on commercial properties may integrate dedicated electrical panels for extensive outdoor lighting systems.
How do I hide extension cord connections from view?
Route extension cords along existing landscape features—fence bases, underneath deck skirting, behind dense plantings. Use earth-tone or green cords that blend with vegetation. For elevated connection points, position where architectural elements (deck posts, tree trunks, rain gutters) obscure visibility. Outdoor-rated junction boxes provide weatherproof enclosures for connections requiring permanent exposure. In premium installations, bury cords in landscape conduit trenches 6-8 inches deep.
What’s the ideal height for hanging backyard string lights?
Target 8-10 feet minimum clearance above finished grade for walking areas, ensuring head clearance for tall individuals. Above dining tables or seating areas, 6.5-7 feet provides intimate ambiance without uncomfortable proximity. Local building codes may specify minimum heights above decks and patios—verify requirements before installation. Higher mounting (12-15 feet) delivers broader light distribution across larger spaces but requires tall ladders or specialized equipment for installation and maintenance.
Can string lights connect to regular indoor outlets through windows?
While physically possible, this practice violates electrical safety codes in most jurisdictions. Indoor outlets lack GFCI protection required for outdoor applications. Running cords through windows creates potential water intrusion paths and compromises building envelope integrity. Install dedicated outdoor outlets with weatherproof covers and GFCI protection—a worthwhile investment providing safe, code-compliant power access for all outdoor electrical needs.
Key Takeaways
- Successful backyard string lighting begins with comprehensive planning: measure twice, buy once, and map anchor points before purchasing materials
- LED technology delivers 85-90% energy savings compared to incandescent alternatives while providing 25,000+ hour lifespans
- Guide wire systems prevent sagging on spans exceeding 20 feet and provide stability in windy conditions
- Year-round installations require quarterly maintenance checks; seasonal removal extends fixture life in harsh climates
- Professional installation makes sense for complex electrical work, roof mounting, or commercial-grade permanent systems