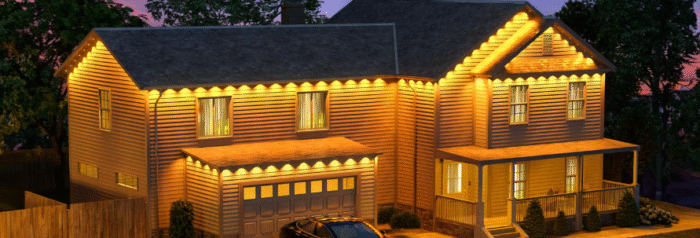
Eave Lighting Installation Guide: LED Selection, Fixture Spacing & Wiring Essentials
Eave lighting installation requires choosing LED fixtures rated IP65 or higher, spacing them 6-8 feet apart for uniform coverage, and using low-voltage wiring connected to GFCI-protected outlets. The process involves measuring your eaves, mounting fixtures to structural supports rather than soffit panels, and routing cables through protected channels to prevent water damage.
Selecting LED Fixtures for Outdoor Eave Lighting
The LED fixture you choose determines installation complexity, energy costs, and how long your system lasts before requiring maintenance.
Weatherproofing Standards
Outdoor LED eave lights must handle rain, snow, and temperature swings. Look for an IP (Ingress Protection) rating of IP65 or higher. The first digit (6) means complete dust protection; the second (5 or higher) indicates water resistance from spray at any angle. IP67-rated fixtures withstand temporary submersion, which matters in areas with wind-driven rain or where gutters occasionally overflow.
UV-resistant materials prevent yellowing and brittleness. Polycarbonate lenses and powder-coated aluminum housings maintain their appearance and structural integrity through years of sun exposure. Fixtures without UV protection typically show visible degradation within 18-24 months.
LED Type and Color Temperature
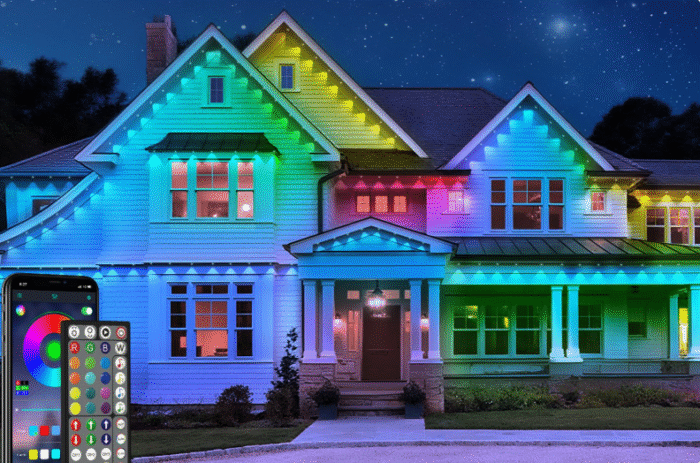
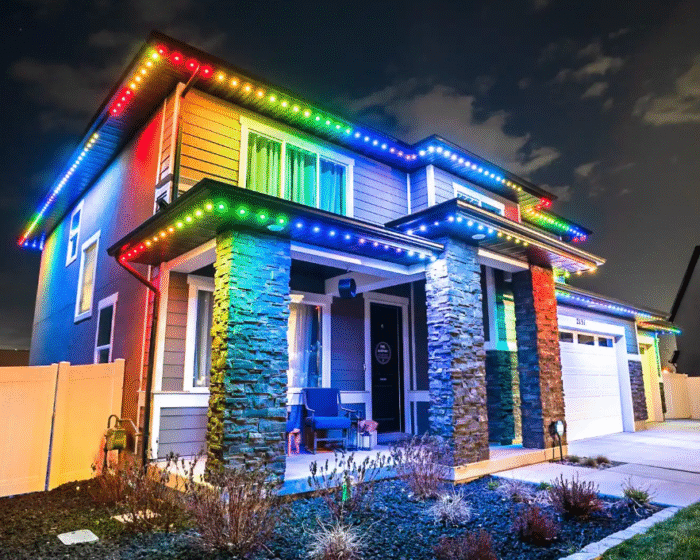
RGB+WW (Red-Green-Blue plus Warm White) LED chips offer the widest range. These combine color-changing capability with traditional warm white (2700-3200K) for everyday use. If you only need functional lighting, single-color warm white LEDs cost 30-40% less and draw slightly less power.
Lumens per fixture determine brightness. For ambient exterior eave lighting, 250-400 lumens per fixture provides adequate illumination without the harsh “stadium light” effect. For security-focused installations under eave mount flood light applications, 700-1000 lumens creates enough light to trigger motion-sensing cameras.
Beam angle affects coverage. Fixtures with 40-60 degree beam angles work well for general eave lighting, casting light across walls and nearby ground. Narrower 20-30 degree beams suit accent lighting for specific architectural features.
Power Requirements
Most modern outdoor led eave lights operate on low voltage (12V or 24V DC) supplied by a transformer plugged into standard 120V AC outlets. Low-voltage systems simplify installation since you don’t need an electrician for the fixture wiring—only for adding new GFCI outlets if existing ones aren’t available.
Calculate total wattage before purchasing. If each fixture draws 5 watts and you’re installing 20 lights, you need at least 100 watts of transformer capacity. Add 20% overhead (120 watts) to prevent the transformer from running at maximum capacity, which shortens its lifespan.
String lights and LED strip lights under eaves typically connect in series using integrated connectors, with power limits around 150-200 feet per transformer depending on wire gauge. Recessed fixtures for exterior eave lighting usually require individual home runs or branch circuits.
Planning Eave lighting Fixture Spacing and Layout
Poor spacing creates dark gaps or over-illuminated zones that waste energy and look unbalanced.

Standard Spacing Guidelines
The 6-8 foot spacing rule applies to most residential installations with 8-10 foot eave heights. This distance provides overlapping light coverage without shadows between fixtures. Measure from the center of one fixture to the center of the next.
For higher eaves (12-16 feet), decrease spacing to 5-6 feet. The increased mounting height causes light to spread more before reaching the ground, so closer placement compensates. Conversely, low eaves under 7 feet can use 8-10 foot spacing.
Start measurements from corners and work toward the center. Place the first fixture 3-4 feet from each corner—half the standard spacing. This prevents corner shadows and balances the visual weight across the roofline.
Architectural Considerations
Mark window and door locations on your eave map. Place fixtures between windows rather than directly above them to avoid glare through glass at night. The reflection of outdoor led eave lights in windows creates an unintended mirror effect that reduces curb appeal.
Identify roof valleys, dormers, and angle changes. These transitions need fixtures on both sides of the break, even if they fall within the normal spacing interval. A single light at a corner where two eave lines meet looks incomplete.
Account for downspouts and gutter brackets. Drilling through or mounting near these elements complicates installation and may void gutter warranties. Shift fixture locations 12-18 inches to clear obstacles.
Power Source Planning
Walk your eave perimeter and note existing exterior outlets. GFCI-protected outlets must supply power to the transformer or control box. If outlets only exist on one side of the house, you’ll need either very long low-voltage cable runs (verify voltage drop) or additional outlets installed by an electrician.
Transformers and controllers should mount in ventilated, protected locations—under eaves but not exposed to direct rain splash. Garage walls, covered porches, and utility areas near the main electrical panel work well.
Wiring Methods and Eave lighting Electrical Requirements
Incorrect wiring causes voltage drop, flickering, or complete system failure. It also creates fire hazards if connections aren’t waterproofed.
Low-Voltage Wiring Best Practices
Use cable rated for direct burial or outdoor exposure even when routing through conduit. Standard indoor wire insulation degrades under UV and moisture. Look for UL-listed cable with specifications matching your system voltage (12V or 24V).
Wire gauge matters for long runs.
For runs under 50 feet with total load under 100 watts, 18 AWG wire works.
For 50-100 feet or loads up to 200 watts, use 16 AWG. F
or anything longer or more powerful, step up to 14 AWG to minimize voltage drop that causes dimming at the far end of the circuit.
Create drip loops where cables enter the transformer and at each fixture connection. Route the cable slightly below the connection point, then bring it up. Water follows gravity down the cable and drips off instead of entering the connector.
Connection Techniques
Twist-on wire connectors (wire nuts) are common but require waterproof enclosures. After twisting wires together and adding the connector, wrap the connection with self-fusing silicone tape, then place it in a junction box with a weatherproof cover.
Heat-shrink connectors with solder sleeves provide better waterproofing for permanent installations. Slide the heat-shrink tube over the wire, strip and overlap the conductors, position the solder sleeve at the junction, and apply a heat gun. The solder melts to create an electrical connection while the adhesive-lined heat-shrink creates a waterproof seal.
Many modern christmas lights on eaves and permanent systems use push-connectors or twist-lock waterproof plugs between fixture sections. These work well but verify the IP rating of the connector itself—the junction is often the failure point.
GFCI Protection Requirements
The National Electrical Code requires GFCI protection for all outdoor receptacles and lighting connected to 120V circuits. Your transformer or power supply must plug into a GFCI outlet, or the circuit breaker controlling that outlet must be GFCI-type.
GFCI devices detect ground faults (leakage current) and cut power in milliseconds, preventing shock hazards. Test GFCI outlets monthly using the test button. If the outlet doesn’t trip, replace it—the protection mechanism has failed.
Low-voltage secondary circuits (12V/24V) downstream from the transformer don’t require separate GFCI protection since the transformer isolates them from line voltage. However, all connections must still be waterproof to prevent short circuits that damage equipment.
Conduit and Cable Routing
Exposed wiring looks unprofessional and fails inspections. Route cables through conduit, along structural members, or concealed behind trim.
For visible runs on soffits or walls, use color-matched cable raceway or J-channel. White or aluminum raceway blends with most homes. Some permanent outdoor lights for eaves come with integrated channels that hold both the fixture and wiring.
When drilling through soffits to access attic space, drill pilot holes first and check for clearance with a stiff wire. Roof trusses, blocking, and HVAC ducts often occupy the space above. Missing these by an inch prevents having to patch holes and redrill.
Seal all penetrations. After routing cable through soffit panels, fascia boards, or walls, fill gaps around the wire with exterior-grade silicone caulk. This stops insects, prevents water intrusion, and maintains the building’s thermal envelope.
Installation Eave lighting Process Step-by-Step
Physical installation translates planning into a functioning system. Careful execution prevents the need for corrective repairs.
Surface Preparation
Clean mounting surfaces with a damp cloth or mild detergent solution. Dust, pollen, and cobwebs prevent adhesives from bonding and make screw holes more likely to split wood. For painted surfaces more than 5 years old, lightly sand the mounting area to expose fresh paint or primer for better adhesion.
Check soffit material before drilling. Vinyl and aluminum soffits flex and crack under pressure. These require backing boards or specialized mounting brackets that distribute weight across a larger area. Never rely solely on screws driven into thin sheet goods—the fixtures will sag within months.
For under eave lighting on solid wood soffits, locate joists with a stud finder. Mounting fixtures directly to structural members rather than just the soffit panel ensures they stay secure through wind and weather. If joist spacing doesn’t align with your planned fixture locations, install 2×4 backer boards between joists before hanging fixtures.
Cutting Holes for Recessed Fixtures
Mark hole diameters with a pencil, tracing the fixture housing or using the template often included in packaging. For 4-inch recessed lights, the hole typically measures 3.75 inches; for 6-inch fixtures, 5.75 inches.
Use a hole saw for clean cuts. Start at low speed to let the pilot bit establish center, then increase RPM. For vinyl or aluminum soffits, place masking tape over the cut line to prevent the material from flexing and creating rough edges.
Test-fit the housing before running wires. The fixture should seat firmly against the soffit face with spring clips engaging or mounting tabs aligning with pre-drilled holes. If the hole is too small, enlarge it incrementally. Too large, and you’ll need a trim ring or larger fixture.
Mounting Surface Fixtures
For lights secured with screws, drill pilot holes slightly smaller than screw diameter. This prevents wood from splitting while still allowing threads to bite. Use stainless steel or coated deck screws for outdoor applications—standard interior screws rust and fail.
Adhesive-mounted fixtures (common on modern rgb eaves lights) require pressure for 8-10 seconds per manufacturer instructions. The mounting pad should make full contact; any gaps reduce bond strength. Some systems include supplemental clips or screws as backup fasteners. Use them—3M VHB adhesive is strong, but mechanical fasteners prevent total failure if adhesive weakens.
Level each fixture before final tightening. A small torpedo level or smartphone level app works well. Fixtures tilted even a few degrees create uneven light distribution that looks sloppy.
Wiring Connections
Strip wire insulation carefully. Strip gauges or automatic wire strippers prevent nicking conductors, which weakens connections. For most low-voltage fixtures, strip 3/8 to 1/2 inch of insulation.
Match polarity on DC circuits. Red or marked wires indicate positive; black or unmarked indicate negative. Reversed polarity prevents LEDs from lighting. Some RGB systems use 3-4 conductors for separate color channels—follow the manufacturer’s color code exactly.
Tug-test every connection. After securing wires with connectors, pull gently on each wire. Properly made connections don’t separate. If a wire pulls out, redo the connection—it will fail eventually, usually at the worst time.
Testing Before Final Installation
Power up the system with fixtures loosely positioned but not permanently mounted. Verify every light illuminates at expected brightness. Check color-changing functions if applicable. Adjust dimmer or controller settings to desired levels.
Look for flickering, which indicates loose connections or voltage drop. Unusually dim lights at the end of a run suggest wire gauge is too small for the distance. Address these issues before securing fixtures permanently—it’s far easier to troubleshoot and modify with components still accessible.
Walk the perimeter at night to evaluate light distribution. Dark spots between fixtures indicate spacing needs adjustment. Overly bright zones wash out architectural detail instead of enhancing it.
Common Installation Eave lighting Mistakes to Avoid
Learning from others’ errors saves time and materials.
The Alien Spaceship Effect
Installing only downward-facing eaves lights without balancing them against landscape or wall-wash lighting makes homes appear to float. The roofline glows bright while the foundation disappears into darkness.
Fix this by adding uplights at ground level to illuminate walls, or by angling some eave fixtures outward to graze exterior surfaces. The goal is visual continuity from ground to roofline rather than a sharp line of light overhead.
Over-Illumination
Using commercial-grade fixtures rated for parking lots or warehouses creates glare that reduces security instead of improving it. Eyes adapt to bright zones, making adjacent darker areas harder to see—exactly where intruders prefer to operate.
Residential exterior eave lighting rarely needs more than 400 lumens per fixture for ambient lighting. Security zones benefit from 600-800 lumens, but only in targeted areas like entry doors. Everywhere else, subtler lighting looks better and uses less energy.
Ignoring Weight Limits
Vinyl soffits support 2-3 pounds per square foot; thin aluminum soffits support even less. Heavy fixtures or multiple fixtures clustered near a single mounting point cause sagging that looks bad and eventually tears through the material.
Distribute weight by spacing fixtures evenly and using backing boards where necessary. If a fixture weighs over 5 pounds, it needs mounting to structure—not just soffit panels.
Skipping Expansion Gaps
Materials expand and contract with temperature. Rigid wiring without service loops or flex points breaks conductors during seasonal movement. Fixtures mounted tightly against trim boards with no clearance crack the trim as they shift.
Leave 1/8-inch gaps around fixture edges when mounting near trim. Use flexible cable sections near transformation points rather than rigid wire. Allow slight slack in cable runs instead of pulling them drum-tight.
Poor Waterproofing
Water finds every gap. Unsealed wire entries, improperly tightened compression fittings, and missing gaskets let moisture into junction boxes and fixture housings.
Check weatherproofing annually. Caulk that worked when fresh deteriorates under UV and temperature cycling. Re-seal connections if caulk has cracked or pulled away. Replace gaskets if compressed flat—they no longer seal.
Frequently Asked Questions
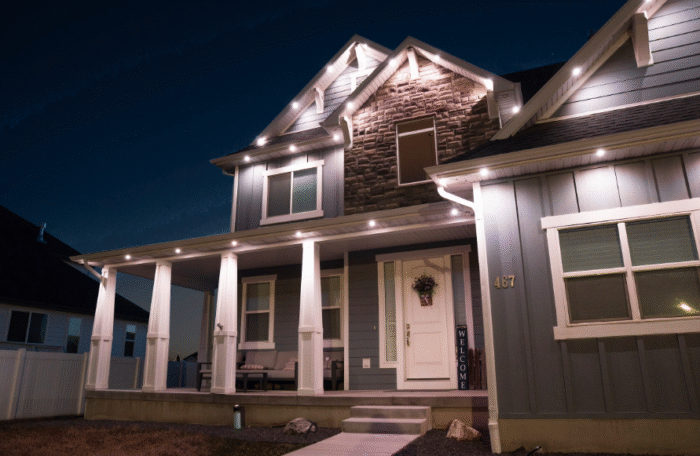
What’s the difference between eave lights and soffit lights?
Eave lights mount to the horizontal surface underneath roof overhangs, casting light downward and outward. Soffit lights are recessed fixtures installed flush into soffit panels. Both illuminate exterior walls and ground areas, but soffit lights offer a cleaner, more integrated appearance while eave lights (especially LED strips and string lights) are easier to install without cutting holes.
Can I install eave lighting myself or do I need an electrician?
Low-voltage eave lighting systems (12V/24V) with plug-in transformers don’t require an electrician for the fixture installation. You’ll need one if adding new GFCI outlets or converting an existing switch to control the lights. Line-voltage systems (120V) connected directly to household wiring require an electrician and permits in most jurisdictions.
How much do LED eave lights increase energy bills?
Twenty fixtures at 5 watts each draw 100 watts total—the same as a single incandescent bulb. Running 6 hours per night costs roughly $2-3 monthly at average electricity rates. Solar-powered options eliminate operating costs but require careful placement for adequate sun exposure.
Will eave lighting damage my gutters or soffits?
Properly installed fixtures don’t cause damage. Issues arise from drilling too close to gutter brackets, over-tightening mounting screws that crack soffit panels, or using fixtures too heavy for the mounting surface. Always mount to structure where possible and use appropriate hardware for the material type.
How often do LED eave lights need replacing?
Quality LED fixtures last 25,000-50,000 hours—roughly 10-20 years at typical usage rates. Transformers, controllers, and connections often fail first. Plan to replace transformers every 7-10 years and inspect/repair connections every 3-5 years. Inexpensive fixtures may need replacement in 3-5 years as LEDs dim or housings degrade.
What wire size should I use for long runs?
For runs up to 50 feet with combined load under 100 watts, use 18 AWG. For 50-100 feet or up to 200 watts, use 16 AWG. Beyond that, 14 AWG prevents excessive voltage drop. Calculate voltage drop online using calculators specific to your system voltage—exceeding 3% drop causes noticeable dimming.
Maintenance and Troubleshooting
Regular upkeep extends system life and maintains performance.
Quarterly Checks
Wipe fixture lenses with a soft cloth to remove dust, pollen, and cobwebs. Dirty lenses reduce light output by 15-20%. For fixtures in heavily-shaded areas prone to algae growth, use a solution of 1 part bleach to 10 parts water, rinse thoroughly.
Inspect visible wiring for damage. Look for insulation cracking, exposed conductors, or signs of chewing (squirrels and mice damage wiring surprisingly often). Replace any compromised sections immediately.
Test GFCI protection monthly. Press the test button; the outlet should trip and cut power. If it doesn’t, the GFCI device has failed and needs replacement—protection is no longer present.
Addressing Common Issues
Flickering lights usually mean loose connections. Power down the system and check all wire nuts, push connectors, and terminal blocks. Tighten or remake connections as needed. Persistent flickering after repairing connections suggests a failing transformer or controller.
Dim lights at the end of a run indicate voltage drop. Verify wire gauge matches the distance and load. If undersized, either upgrade to heavier wire or add a second transformer to split the circuit into shorter runs.
Dead fixtures should be isolated and tested. Disconnect the fixture and test voltage at the wire connection. If voltage is present but the fixture doesn’t light, the fixture itself has failed. If no voltage, trace back through the circuit to find where power stops.
Seasonal Adjustments
Adjust timers and photocontrol sensors twice yearly when switching between daylight saving time and standard time. Sensors may also need cleaning or repositioning as nearby trees and landscaping grow and affect light levels reaching the sensor.
In winter, remove snow and ice buildup from fixtures. Excessive weight can damage housings or pull fixtures loose. Salt spray from road de-icing also corrodes aluminum and steel components—rinse fixtures in coastal or heavily-salted areas monthly during winter.
The installation complexity of eave lighting systems varies more with home architecture than fixture type. Single-story homes with accessible soffits make DIY installation straightforward. Multi-story installations or homes with steep-pitched roofs benefit from professional help—the technical work is manageable, but ladder safety becomes the primary concern.
Before finalizing your design, take evening walks through neighborhoods with eave lighting. Notice what works visually and what creates problems. The subtlest, most effective installations often go unnoticed consciously but make homes feel welcoming and well-maintained.