Complete Guide to String Lighting Backyard: From Power Source Selection to Installation Tips
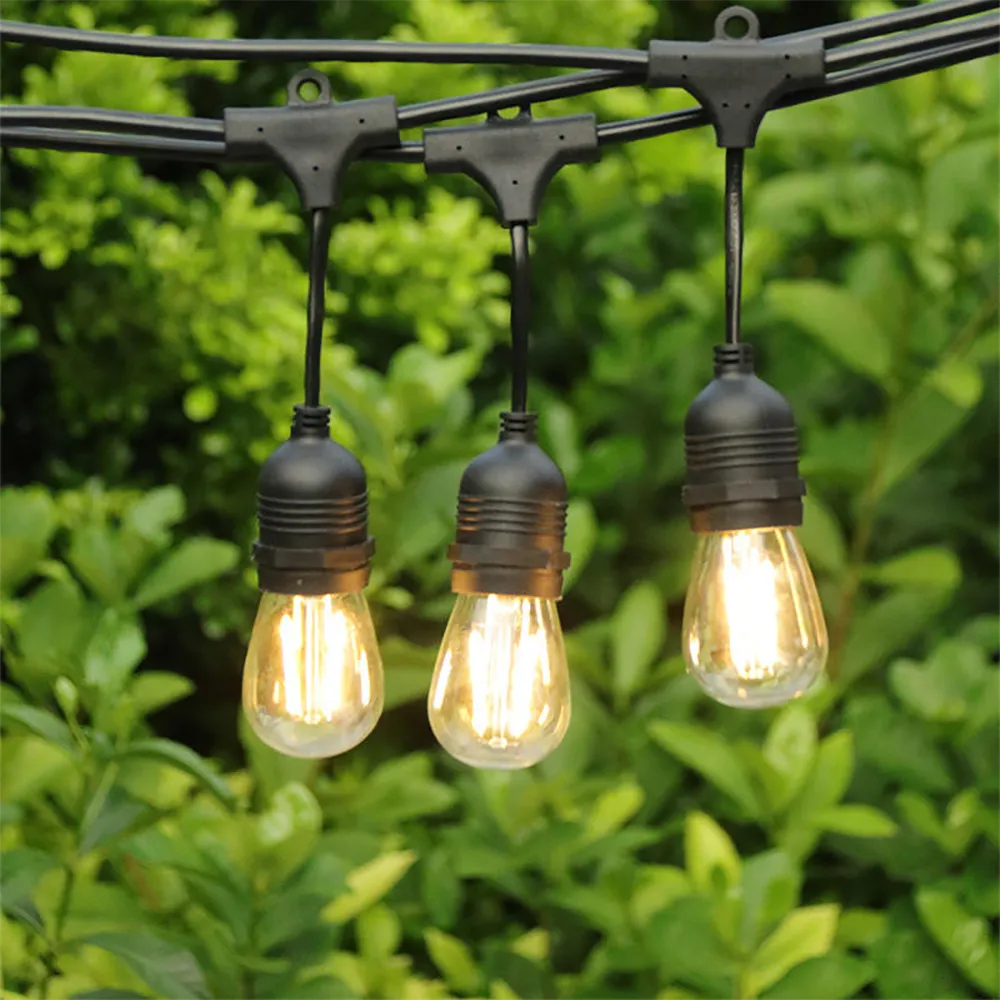
it’s a warm summer evening, and your backyard transforms into a magical retreat as soft Edison bulbs cast a golden glow across your patio. Friends gather around outdoor furniture, laughter fills the air, and the atmosphere feels like an upscale bistro—all because you installed string lighting in your backyard. This versatile lighting solution has become a cornerstone of outdoor living spaces, combining functionality with undeniable charm. String lighting backyard installations can increase your property’s usable outdoor space by up to 40% during evening hours while potentially raising home value by 2-4% according to 2024 real estate data.
Understanding String Lighting for Backyard Spaces: The Big Picture
String lighting backyard systems represent far more than decorative accessories. These outdoor lighting solutions function as architectural elements that define spaces, establish zones, and create ambiance in ways traditional fixtures cannot match.
What Makes Modern String Lighting Different
Modern string lighting encompasses several technologies. LED-based systems dominate the market in 2025, consuming 75-90% less energy than incandescent alternatives while delivering comparable warmth and brightness. The typical LED string light operates at 0.5-1 watt per bulb compared to 5-7 watts for traditional bulbs, translating to annual savings of $35-60 for a standard 100-foot installation running 4 hours nightly.
Professional-Grade vs Consumer String Lighting
The construction quality separates professional-grade products from consumer variants. Commercial-grade string lights feature SJTW (Service Junior Thermoplastic Weather-resistant) wire rated for outdoor exposure, with gasketed sockets that prevent moisture intrusion. These specifications enable year-round installation across climate zones, from Arizona’s 120°F summers to Minnesota’s -20°F winters. The global outdoor lighting market reached $14.2 billion in 2024, with backyard string lights comprising approximately 18% of residential installations—a figure projected to grow 7% annually through 2027.
Three Types of Backyard String Lighting Applications
String lighting backyard applications span multiple functional categories. Ambient lighting provides overall illumination at 10-20 lumens per square foot, sufficient for navigation and casual activities. Task lighting concentrates 40-80 lumens per square foot over dining tables or outdoor kitchens. Accent lighting employs strategic placement to highlight architectural features, landscaping, or water elements. Many homeowners combine all three approaches within a single installation, creating layered lighting that adapts to different occasions.
The Science Behind Outdoor Lighting Appeal
The aesthetic impact extends beyond mere visibility. Research from the Lighting Research Center indicates that warm-spectrum lighting (2700-3000K) triggers relaxation responses and encourages longer outdoor dwelling times. This biological response explains why properly lit outdoor spaces see 65% higher utilization rates compared to standard landscape lighting alone.
Three Primary Power Sources: Plug-In vs Solar vs Low-Voltage Systems
Power source selection fundamentally shapes your string lighting backyard project’s performance, costs, and installation complexity. Each approach presents distinct trade-offs that align with different scenarios and priorities.
Plug-In AC Systems: Maximum Power and Consistency
Plug-in AC systems connect directly to 120-volt household circuits, delivering consistent performance regardless of weather conditions. These systems support the brightest bulbs, longest runs (up to 250 feet when properly calculated), and unlimited operating hours. A quality plug-in setup provides 800-1200 lumens per 48-foot strand—enough to illuminate a 400-square-foot patio adequately. The National Electrical Code (NEC 2023) requires GFCI protection for all outdoor circuits, with breakers rated 15-20 amps capable of handling 4-6 typical string light strands simultaneously. Installation demands access to weatherproof outlets (NEMA 3R or 4X rated) within 100 feet of your desired lighting zones, though professional-grade outdoor extension cords rated for permanent use can bridge moderate gaps. Annual operating costs run $12-25 for LED plug-in systems used 4 hours daily, factoring typical electricity rates of $0.13-0.15 per kWh.
Solar-Powered Systems: Installation Flexibility with Trade-Offs
Solar-powered systems eliminate electrical infrastructure entirely, harvesting daylight through photovoltaic panels typically rated 5-20 watts. Modern solar string lights employ lithium-ion batteries storing 2000-4000mAh capacity, sufficient for 6-8 hours of illumination after a full charge. However, performance varies dramatically with conditions. A 2024 Department of Energy study found solar systems deliver 100% rated output only 45-60% of yearly days in most U.S. regions, with performance dropping 40-70% during winter months or in heavily shaded locations. Brightness likewise lags AC systems, with most solar units outputting 200-400 lumens per strand—adequate for accent lighting but insufficient for task illumination. The upside includes zero operating costs and installation flexibility, allowing placement anywhere receiving 4+ hours of direct sunlight daily. Quality matters intensely with solar products; premium units featuring monocrystalline panels and IP67-rated components outlast budget alternatives by 3-5 years, translating to $80-120 value over product lifecycles.
Low-Voltage Systems: Safety Meets Performance
<strong>Low-voltage systems operate on 12-24V DC power supplied by plug-in transformers, combining AC performance consistency with enhanced safety. These installations eliminate shock hazards, allowing DIY-friendly placement without electrical permits in most jurisdictions. The voltage drop formula (Voltage Drop = 2 × L × I × R / 1000, where L=length in feet, I=current in amps, R=resistance) becomes critical, as #16 AWG wire supports approximately 75 feet at 24V with acceptable 10% voltage drop. Beyond this threshold, bulbs visibly dim at run endpoints. Transformers range from 50-300 watts, with proper sizing requiring 20% overhead beyond calculated load. A typical 150-watt transformer handles five 25-foot strands with 1-watt bulbs. Low-voltage components cost 15-25% more than equivalent AC products initially but enable creative installations around water features or within reach of children—scenarios where 120V circuits raise concerns. Professional landscapers favor these systems for integrated designs incorporating path lighting, uplighting, and string elements on unified power supplies.</p>
Choosing the Right Power Source for Your Project
For most backyard string lighting installations, I deploy plug-in LED systems where outlets exist within 50 feet, solar for remote garden areas or temporary seasonal displays, and low-voltage for projects requiring multiple lighting types on coordinated controls. A hybrid approach often yields optimal results—using AC strings for primary patio coverage while supplementing with solar accent lights along distant fence lines or tree perimeters.
Planning Your Layout: From Measurement to Pattern Selection
Successful string lighting backyard projects begin with thorough spatial analysis, not product purchases. This planning phase determines every subsequent decision and separates professional-looking installations from amateur attempts.
Measuring Your Space and Identifying Anchor Points
Start by sketching your backyard to scale, noting dimensions of key areas: patio dimensions, distance from house to fence lines, tree positions, and existing structures. Measuring tapes should account for both horizontal spans and vertical clearances. The Illuminating Engineering Society recommends minimum 7-foot clearance over walking paths, rising to 8-10 feet over dining areas to prevent head contact while standing. For overhead canopy effects, 10-12 feet provides ideal height, creating spacious feelings without requiring extension ladders for bulb changes.
Anchor point identification follows measurement. Natural features like mature trees offer convenient attachment, though you must protect bark with rubber-lined hooks or straps—never nails or screws penetrating cambium layers. Existing structures (pergolas, arbors, rooflines) provide ready mounting surfaces. Where natural anchors lack, freestanding posts become necessary. I install 4×4 or 6×6 pressure-treated posts in 24-inch-deep foundations, spacing them 20-30 feet apart for typical residential applications. Posts set in concrete-filled half-barrels or large planters offer semi-permanent alternatives, particularly useful for renters or seasonal installations. Each anchor point must withstand 15-25 pounds of lateral force—the tension generated by taut string lights, wind loading, and occasional accidental snags.
Selecting String Lighting Patterns for Visual Impact
Pattern selection transforms functional wiring into design elements. The straight-run pattern connects two parallel points, creating clean lines suitable for rectangular patios or deck perimeters. Zigzag or crisscross patterns employ multiple anchor points in alternating configurations, building visual interest while increasing light coverage. Canopy patterns radiate from central poles outward to perimeter points, mimicking circus tent aesthetics popular for dining areas. Grid patterns intersect multiple parallel runs at right angles, producing maximum coverage ideal for large open spaces or event venues. My professional projects typically incorporate 2-3 pattern types within single properties—straight runs along fences, zigzags over seating zones, and canopies above dining tables.
Calculating Bulb Spacing and String Length
Bulb spacing emerges as another critical specification. Standard spacing runs 18-24 inches center-to-center, providing even illumination without harsh shadows or noticeable gaps. Closer 12-inch spacing intensifies brightness for functional task areas, while wider 36-inch spacing creates subtle accent effects. The mathematical relationship between span length, sag amount, and perceived spacing requires attention. A 40-foot span with 2-foot planned sag actually extends string length to approximately 43 feet via the catenary curve formula—a 7.5% increase that novices often underestimate.
Electrical Planning and Load Calculations
Electrical planning concludes layout work. Calculate total wattage by multiplying bulb quantity by individual wattage, then add 20% safety margin. A 100-foot strand with fifty 1-watt LED bulbs requires 60 watts (50W × 1.2), meaning a standard 15-amp circuit (1,800 watts capacity) handles 30 such strands theoretically—though practical limits suggest 6-8 strands accounting for startup surge and other circuit loads. Outlet positioning determines extension cord needs. Outdoor-rated cords should be 14 AWG minimum for runs exceeding 50 feet, with 12 AWG preferred for 75+ feet to minimize voltage drop. Map these electrical runs during planning to identify any conduit installations or additional outlet boxes required before mounting lights.
Essential Tools and Hardware: Your Installation Kit
Gathering correct tools prevents mid-project delays and ensures professional results. This comprehensive kit addresses both basic and advanced installation scenarios encountered in typical string lighting backyard projects.
Mounting Hardware for Different Surfaces
Mounting hardware forms your physical attachment system. Cup hooks or screw eyes (rated for outdoor use, typically zinc-plated or stainless steel) fasten lights to wood surfaces. Sizes range from #206 (1-inch) for lightweight applications to #216 (3-inch) for heavy-duty commercial strings. For masonry or stucco, use concrete anchors with hooks—tapcon screws or sleeve anchors rated for 50+ pound pull-out resistance. Adhesive hooks offer damage-free alternatives for siding or metal surfaces, though weight capacity (typically 5-10 pounds) limits them to lighter string types. I stock multiple varieties, selecting based on surface material and expected load.
Guide Wire Systems for Long Spans
Guide wire systems support lights across spans exceeding 30 feet or requiring taut arrangements. Galvanized steel cable (1/16 to 1/8-inch diameter) runs between fixed endpoints with turnbuckles enabling tension adjustment. Cable clamps (also called wire rope clips) secure loops at termination points—use three clamps per connection following the “right way” orientation where the U-bolt contacts the dead end. Thimbles protect cable where it loops through hooks or eyes, preventing kinking that reduces strength. For a 50-foot span, 1/8-inch cable with 400-pound breaking strength handles multiple string light strands safely. The alternative approach employs the existing string light wire as its own support, though this increases voltage drop and strain on sockets—acceptable only for shorter runs with quality commercial-grade cord.
Attachment Accessories and Fasteners
Attachment accessories secure lights to support structures. Zip ties (UV-rated black plastic, 8-inch length) provide quick, adjustable mounting. Place ties every 3-4 feet along guide wires, leaving slight play for thermal expansion. Light clips specifically designed for string lights offer cleaner aesthetics than zip ties while enabling easier reconfigurations. S-hooks allow suspension from overhead structures. Stainless steel wire or heavy monofilament fishing line (80-100 pound test) works for nearly invisible vertical drops, particularly effective when suspending lights from tree branches.
Power Tools and Installation Equipment
Installation tools complete your kit. Drill/driver with bits matching your anchor hardware cuts through wood, masonry, or metal. For concrete or brick, hammer drills accelerate the process dramatically. Ladder or scaffolding reaches overhead mounting points—working height should keep your standing waist at the work zone, preventing overreach. Measuring tape (25-50 foot) ensures accurate spacing. Level guarantees horizontal runs or consistent slopes for water drainage. Wire cutters/strippers prepare custom cable lengths and trim zip tie tails. Voltage tester confirms power presence and correct polarity before making connections. For advanced installations, a continuity tester troubleshoots bulb outages without removing entire strands.
Safety Equipment and Material Quantities
Safety equipment protects against the two primary hazards: electrical shock and falls. GFCI-protected circuits should be verified functional with the test button monthly. Voltage testers confirm the power-off status before any wiring work. Non-conductive ladders (fiberglass) prevent shock paths if contacting energized components. Gloves protect hands from sharp wire ends and metal burrs. Eye protection guards against drilling debris. During wet conditions, delay electrical work entirely—the combination of water and electricity remains unforgiving regardless of experience level.
Material quantities for a typical 50-foot installation include: 1 string light set, 12-15 mounting hooks/eyes, 75 feet guide wire (if used), 6-8 cable clamps, 20-30 zip ties, 50-foot outdoor extension cord (12 or 14 AWG), and miscellaneous hardware like washers or anchors. Buying 10-20% extra ensures miscuts or lost pieces don’t halt progress.
Step-by-Step Installation Process: From Ground to Illumination
Proper installation sequence prevents the frustration of discovering issues after lights are hung. This proven workflow applies across virtually all string lighting backyard configurations.
Phase 1: Pre-Installation Testing
Phase 1: Pre-installation testing begins every project. Uncoil string lights completely—never test while wrapped, as this may overheat bulbs and damage sockets. Plug into a working GFCI outlet and verify every bulb illuminates. LED strands rarely have dead bulbs new, but cheaper products occasionally slip through quality control. Incandescent sets inevitably include 1-2 bad bulbs per 25-bulb strand. Note any issues immediately; most retailers accept returns within 30-90 days, but not after installation. This testing also familiarizes you with connector locations—most strings have male plugs at one end and female sockets at the other, enabling end-to-end linking. Some commercial products feature center-tap connections or double-ended plugs requiring different approaches.
Phase 2: Installing Anchor Points
<strong>Phase 2: Anchor point installation establishes your support structure. Mark each hook location with a pencil or painter’s tape, using a level for horizontal runs or ensuring consistent height for aesthetic slope patterns. Drill pilot holes slightly smaller than screw shanks—this prevents wood splitting while providing enough material for secure threading. For wood posts or trim, 3/16-inch pilot holes suit #214 cup hooks ideally. Drive hooks by hand initially, then complete with pliers on the hook’s shoulder for final tightening—never grab the threaded shank. Masonry installations require masonry bits matching anchor diameter, drilling to specified depth (typically 1.5-2 inches). Tap anchors flush with surfaces before installing hook screws. In cases requiring guide wires, install eye bolts with washers and lock nuts rather than screw eyes for superior strength. A turnbuckle at one end enables tension adjustment, while cable clamps secure the opposite terminus. Tension guide wires until barely saggy—over-tightening creates excessive loads potentially damaging mounting points, while under-tensioning allows substantial sway during wind events.</p>
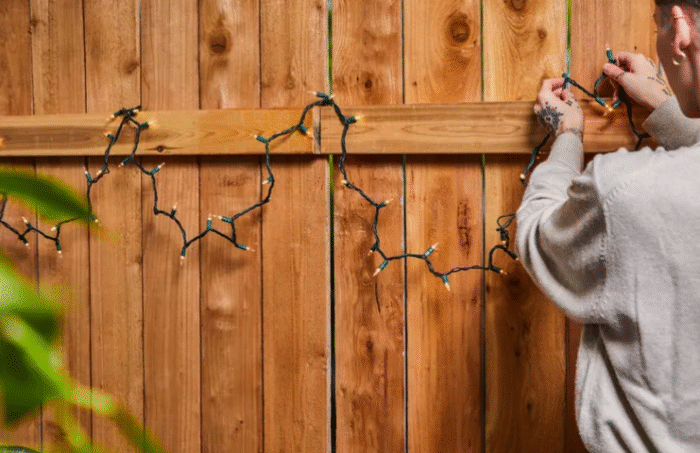
Phase 3: Hanging the String Lights
Phase 3: Light hanging progresses methodically from the power source outward. Beginning at the outlet prevents discovering insufficient length after 90% completion. Thread the first bulb through its designated hook or clip, maintaining slight tension on the strand. Continue along the planned path, spacing support points per your design. For overhead installations, helpers stabilize ladders and pass string sections, drastically improving safety and efficiency. Allow 4-8 inches sag between support points for natural catenary curves—lights pulled drum-tight appear rigid and stress sockets unnecessarily. For guide wire systems, attach lights using zip ties or dedicated clips spaced 3-4 feet apart. Leave an inch or two of play in each attachment, enabling thermal expansion without creating stress points. Check frequently that bulbs hang downward—inverted sockets accumulate water despite weather ratings, shortening lifespan.
Phase 4: Making Electrical Connections
Phase 4: Electrical connections complete the power circuit. If linking multiple strands end-to-end, ensure all connections seat fully—partial insertions create arcing and heat. Manufacturers specify maximum connectable strands (typically 3-5 for LED, fewer for incandescent) based on wire gauge and cumulative current. Exceeding limits risks tripping breakers or creating fire hazards. Where extension cords become necessary, use outdoor-rated types matching or exceeding string light wire gauge. Connect extension to outlet first, then attach string lights to extension’s far end—this sequence prevents the dangerous practice of energizing loose cord ends. Secure connections against weather with electrical tape or purpose-built weatherproof covers. For permanent installations, consider weatherproof junction boxes housing connections, particularly where cords meet guide wires or structural elements. Keep all connections elevated above ground level, preventing submersion during rain or irrigation.
Phase 5: Final Testing and Adjustments
Phase 5: Final testing and adjustment validates your work. Energize the system and inspect every bulb’s illumination. Check for flickering (indicating poor connections), dimming toward strand ends (voltage drop), or dead sections (open circuits). Walk the entire installation from multiple angles, verifying aesthetic intent—lights appearing perfectly spaced from one viewpoint may cluster awkwardly from others. Adjust anchor points if necessary, shifting hooks an inch or two often resolves spacing issues. At night, evaluate brightness levels for intended uses. Dining areas should provide 10-15 footcandles (roughly 100-150 lumens per square meter), while ambient zones require only 3-5 footcandles. If brightness disappoints, options include adding parallel strands, switching to higher-wattage bulbs (respecting maximum ratings), or relocating lights closer to activity zones.
A local café owner implemented this methodology for her 800-square-foot outdoor patio, installing 200 feet of commercial-grade LED string lights across a 4-hour timeframe. The systematic approach prevented the common mistake of running short on wire—she measured twice, accounting for vertical drops and catenary sag, then added 15% buffer. Her initial test revealed three bad LED bulbs, which the supplier replaced before final installation. The guide wire system employed 1/8-inch galvanized cable with turnbuckles, enabling seasonal tension adjustment as temperatures shift 60°F+ across the year. Two years later, zero maintenance beyond occasional cleaning has been required, validating the upfront thoroughness.
Critical Safety Standards and Weatherproofing Requirements
String lighting backyard installations occupy outdoor environments exposing equipment to moisture, temperature extremes, UV radiation, and physical impacts. Meeting appropriate safety standards protects both property and people while ensuring reliable performance.
Electrical Safety Codes and GFCI Protection
<strong>Electrical safety codes govern outdoor lighting under National Electrical Code (NEC) Article 410 covering luminaires. All outdoor circuits require Ground Fault Circuit Interrupter (GFCI) protection, mandatory since the 1971 NEC for outdoor receptacles and later extended to all outdoor circuits. GFCI devices detect current imbalances as small as 4-6 milliamps—the level where human sensation begins—and interrupt power within 25 milliseconds. This protection proves vital as outdoor moisture penetration or damaged insulation creates shock hazards not present with indoor applications. Outdoor receptacles must feature weatherproof covers rated “in-use,” meaning they protect connections even while cords are plugged in. Older “while-not-in-use” covers fail during rain if actively powering equipment. Receptacle boxes should be surface-mounted or designed for exterior use with sealed cable entry points. Underground wiring feeding remote outlets must employ UF-B (Underground Feeder) cable or approved conduit systems, with burial depth minimums of 12-24 inches depending on conduit type and voltage.</p>
Product Certification and Quality Standards
Product certification indicates compliance with safety testing. UL (Underwriters Laboratories) listing verifies products meet safety standards through third-party testing. The UL 2388 standard specifically addresses decorative string lights, examining factors like wire insulation, socket temperature limits, and strain relief adequacy. CSA (Canadian Standards Association) and ETL (Intertek) certifications provide equivalent validation. Avoid products lacking recognizable certification marks—uncertified imports frequently employ inadequate wire gauge, flammable plastics, or insufficient insulation clearances. The few dollars saved become irrelevant when fires or injuries occur.
Weather Resistance Ratings and IP Codes
Weather resistance ratings use the IP (Ingress Protection) code system defining protection against solids and liquids. The format reads “IP” followed by two digits—first indicates solid particle protection (0-6 scale), second describes liquid protection (0-9 scale). Outdoor string lights should meet IP64 minimum (dust-protected, water splash-resistant) for covered areas, IP65 (dust-tight, low-pressure water jets) for general outdoor exposure, or IP67 (dust-tight, temporary immersion) for applications near pools or sprinkler zones. Some manufacturers market products as “weatherproof” without IP ratings—demand specific certifications or assume inadequate protection. Socket gasketing provides critical moisture barriers where wire enters bulb bases; premium products employ silicone or EPDM rubber gaskets, while budget options use simple plastic friction fits offering minimal sealing.
UV Resistance and Material Durability
UV resistance matters for multi-year lifespan. Direct sunlight degrades plastics through photochemical reactions, turning clear housings yellow and making them brittle. UV-stabilized plastics incorporate additives that absorb or reflect damaging wavelengths, extending outdoor life from 1-2 years to 5-8 years. Similarly, wire jackets require UV-rated compounds—SJTW and SJT-OW jacket materials resist sunlight while cheaper PVC degrades rapidly. Examine product specifications for “UV resistant” or “direct sunlight rated” language. In sunny climates like the Southwest, UV degradation accelerates dramatically; prioritize UV-resistant products even at 20-30% price premiums, as replacement costs and labor vastly exceed initial savings.
Wind Loading and Structural Considerations
Wind loading becomes significant across larger installations. A 100-foot string light presents substantial surface area catching wind. During 40-50 mph gusts (common in many regions), improperly secured lights generate surprising forces pulling on anchor points. The solution involves distributing loads across multiple supports rather than depending on single hooks. For wind-prone areas, place intermediate supports every 15-20 feet even where aesthetically unnecessary, preventing excessive sway that stresses connections. Braided steel guide wires handle wind better than string light cords alone. After significant storms, inspect all connections—look for loosened hooks, stressed wire, pulled-out screws, or damaged insulators requiring repair before continued use.
Arc Fault Protection Technology
Arc Fault Circuit Interrupters (AFCI) detect dangerous arcing from deteriorating insulation, loose connections, or damaged conductors. While primarily required for indoor circuits, outdoor string lights left up permanently benefit from AFCI protection, detecting developing faults before failures occur. Combination AFCI/GFCI devices protect against both shock and arc fire hazards. The 2023 NEC mandates AFCI protection for outdoor outlets feeding certain locations; check local amendments as requirements vary regionally.
My practice employs multiple safety layers: GFCI protection at every power source, IP65+ rated products for all exposed components, UV-stabilized materials regardless of application, and regular annual inspections checking connections, insulation integrity, and mechanical security. This redundancy acknowledges that outdoor conditions eventually compromise even quality equipment—detecting issues during maintenance prevents the emergencies caused by deferred attention. The minimal time investment (30-45 minutes annually) provides substantial peace of mind and extends installation lifespan by years.
Selecting Quality Products: LED vs Traditional Bulbs and Beyond
Product selection determines your string lighting backyard system’s performance, longevity, and operating economics. Understanding the technical distinctions between options enables informed choices aligned with specific project requirements.

LED Technology Advantages and Energy Savings
LED technology dominates modern installations, offering compelling advantages over traditional incandescent bulbs. LEDs (Light Emitting Diodes) generate illumination through semiconductor junction electroluminescence rather than heated filaments. This fundamental difference yields 75-90% energy savings—a 1-watt LED produces equivalent luminous output to a 7-10 watt incandescent bulb. Beyond efficiency, LEDs withstand shock and vibration, lack fragile filaments that break during handling or installation, and generate minimal heat. Cool operation enables plastic housings without fire risk and comfortable handling even after extended operation. Lifespan reaches 25,000-50,000 hours for quality LEDs compared to 1,000-2,000 hours for incandescent bulbs—meaning a LED strand operated 4 hours daily lasts 17-34 years versus 1-1.4 years for traditional bulbs. Upfront costs run 30-60% higher for LED products, but total cost of ownership becomes dramatically favorable: over 10 years, a $45 LED strand costs $12-18 in electricity while an equivalent $30 incandescent strand requires $120-140 in power plus $180-210 in replacement bulbs (purchasing strands 7-10 times at $25-30 each).
Color Temperature and CRI Specifications
Color temperature specifications describe the light’s appearance using the Kelvin scale. “Warm white” (2700-3000K) mimics traditional incandescent glow, creating cozy, inviting atmospheres most people prefer for residential applications. “Neutral white” (3500-4100K) appears crisper, offering better color rendering for task lighting over outdoor kitchens or workspaces. “Cool white” (5000-6500K) generates a blue-tinged light suitable for security applications but generally unwelcoming for entertaining. Color Rendering Index (CRI) quantifies color accuracy on a 0-100 scale—values exceeding 80 CRI render most colors naturally, while cheaper LEDs rating 60-70 CRI distort reds and blues noticeably. For backyard settings, prioritize warm white (2700-3000K) with CRI ≥80 unless specific task requirements suggest otherwise.
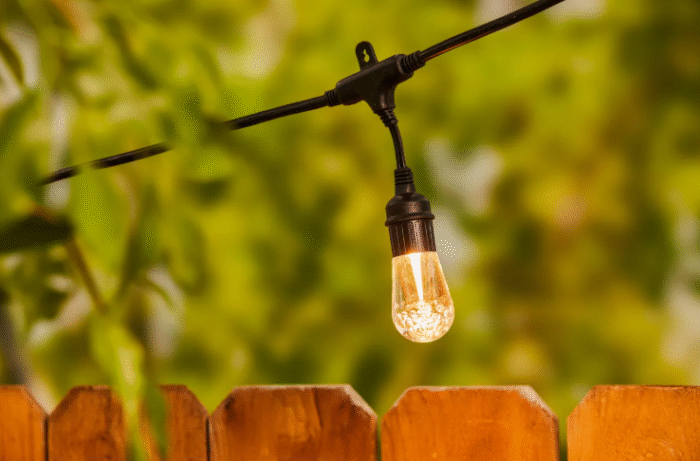
Bulb Shapes, Sizes, and Aesthetic Options
Bulb shapes and sizes affect both aesthetics and light distribution. Edison bulbs (ST shape, typically ST64 or ST38 designations) feature visible filament structures evoking vintage aesthetics, popular for bistro and café themes. G40 and G50 globe bulbs provide omnidirectional light suitable for general illumination. S14 bulbs (elongated glass-shaped) compromise between Edison styling and compact dimensions. Mini LEDs or fairy lights employ tiny bulbs (often <10mm diameter) creating delicate twinkle effects rather than functional lighting. Bulb size impacts spacing requirements—larger G50 bulbs spaced 24 inches apart create continuous visual flow, while the same spacing with small ST38 bulbs appears gapped. Consider viewing distance: intimate patios 10-15 feet from seating look best with larger bulbs, while distant tree-wrapping applications work well with mini sizes appearing as twinkling points from afar.
Shatterproof Construction Benefits
Shatterproof construction eliminates the primary fragility issue of glass bulbs. Modern shatterproof designs employ impact-resistant plastics or polymer composites maintaining optical clarity while withstanding drops, impacts, and flexing. This durability proves vital for outdoor environments where branches sway against bulbs, installation mistakes occur, and maintenance requires removal. The primary shatterproof drawback involves UV degradation yellowing clear plastic over 5-8 years, though quality products employ UV stabilizers delaying this issue. For high-traffic areas or installations within reach of children, shatterproof construction provides essential safety margins absent from fragile glass alternatives.
Commercial-Grade vs Consumer Product Comparison
Commercial-grade versus consumer products present fundamental durability distinctions. Commercial string lights feature heavier wire gauge (typically 18 AWG versus 20-22 AWG consumer), thicker insulation jackets, gasketed sockets resisting moisture intrusion, and brass rather than plastic internal components. Strain reliefs where wire enters plugs employ reinforced rubber rather than simple plastic shells. These enhancements enable permanent year-round installations in harsh environments. Consumer products target temporary seasonal use—adequate for occasional parties or holiday displays but requiring retirement to storage after 3-6 months to achieve even 2-3 year lifespan. The cost differential runs 2-3x: commercial strands cost $40-80 per 48-foot section versus $15-30 for consumer equivalents. For permanent residential installations, commercial-grade products justify their premium through multi-decade service lives and elimination of repeated replacement projects.
A technology consultant compared three string light types across his 60-foot deck installation: (1) commercial-grade LED at $1.40/foot, (2) consumer-grade LED at $0.55/foot, and (3) incandescent at $0.45/foot. After three years, the incandescent strands had been replaced twice due to failures ($135 total cost), consumer LED showed weather damage requiring replacement once ($99 total), while commercial LED operated flawlessly ($84 initial cost, zero replacements). Projected over 10 years, commercial LED costs $84, consumer LED $165-198 (2-3 replacements), and incandescent $315-405 (7-9 replacements). Energy costs amplified disparities: LED options consumed $6-8 annually versus incandescent’s $45-60. The clear economic victor—commercial LED—also delivered superior light quality and eliminated the frustration of repeated reinstallation projects.
Optimizing for Different Backyard Scenarios: Decks, Patios, and Open Yards
String lighting backyard applications vary dramatically across space configurations. Tailoring approaches to specific scenarios maximizes both function and aesthetics while addressing unique challenges each environment presents.
Deck String Lighting Installation Techniques
Deck installations benefit from existing structural elements simplifying mounting. Perimeter railings provide continuous attachment opportunities—use cup hooks screwed into rail caps every 18-24 inches for horizontal runs, or adhesive clips if concerned about drilling holes. Vertical posts support overhead crossings, creating canopy effects above central deck areas. For composite or vinyl railings, adhesive methods or clips hooking over rails prevent permanent modifications landlords or associations might prohibit. Under-rail mounting hides fixtures from below while casting upward illumination—this approach works particularly well for multi-level decks, lighting lower tiers from upper rail positions. Deck installations excel for ease of access to power; most decks connect to home exteriors where outlets already exist. The primary consideration involves weatherproofing connections against rain dripping through deck board gaps. Position power connections under overhead cover or employ weatherproof junction boxes elevating sockets above standing water levels.
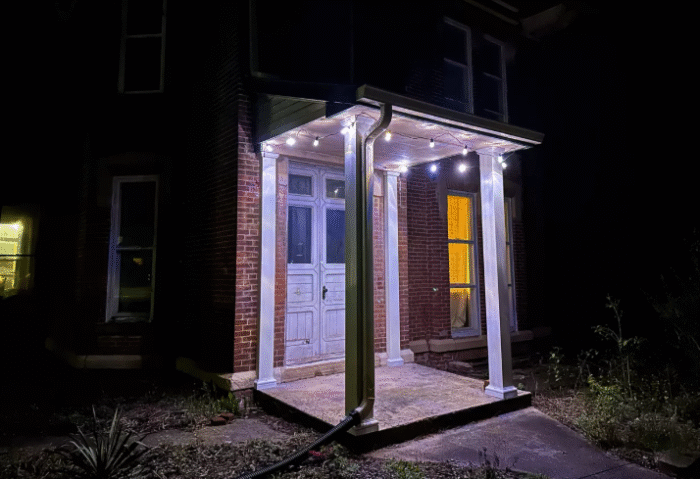
Patio and Pergola Lighting Solutions
Patio and pergola applications leverage existing overhead structures. Rafters, beams, and cross-members offer ready attachment points for zigzag or grid patterns. The typical 8-10 foot pergola height suits overhead lighting ideally—sufficient clearance for standing without requiring ladders for maintenance. For open patios lacking structures, freestanding posts establish anchor points. Set 4×4 posts in concrete footings or large planters, spacing 15-25 feet apart depending on desired strand tension. Paint or stain posts matching decor, or wrap with climbing plants transforming functional elements into design features. Some homeowners employ decorative columns (available in various architectural styles) as both light supports and aesthetic focal points. Covered patios enjoy extended equipment life through weather protection; string lights mounted under rooflines may operate 8-12 years versus 5-6 years for fully exposed installations. Consider integrating string lighting with ceiling fans or other ceiling-mounted fixtures—combined control switches enable single-operation ambiance setting.
Open Yard Installation Strategies
<strong>Open yard installations present the greatest challenges absent natural anchoring structures. Trees become vital where present—mature specimens typically tolerate eye bolt installations without damage when properly executed. Locate anchor points on trunks rather than branches, avoiding the 15-20% annual trunk diameter growth displacing hardware. For treeless properties, establish dedicated post systems. Layout posts in functional patterns: straight lines creating zones, perimeter configurations enclosing areas, or geometric shapes (squares, triangles) defining entertaining spaces. Professional landscapers often incorporate string lighting posts within broader hardscaping projects, utilizing shared footings with arbors, shade structures, or outdoor kitchens. Another approach employs existing fencing as lateral supports, with posts adding height. Mount vertical extensions atop fence posts, elevating string lights to 8-10 feet while fence provides structural base. Where soil conditions permit, auger-style ground anchors (similar to dog tie-outs) offer temporary solutions for events—these screw into earth providing several hundred pounds of pullout resistance, then remove leaving minimal ground disturbance.</p>
Garden and Landscape Integration
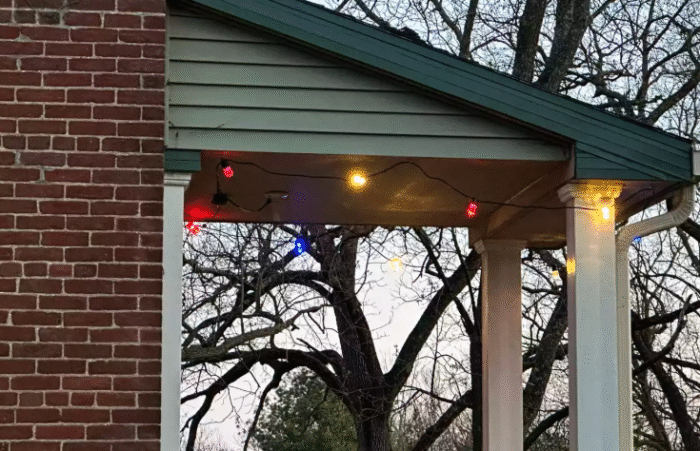
Garden and landscaping integration extends string lighting beyond entertainment zones. Wrap trunk bases or low branches with mini LED strings highlighting ornamental trees. Edge garden beds with low-voltage string lights guiding pathways while showcasing plantings. For vegetable gardens, timer-controlled lighting extends evening harvesting and pest inspection into night hours. Water features gain dramatic appeal through lighting; submersible-rated LED strings create underwater effects in ponds or fountains, though require specialized products distinct from standard string lights. Gazebos and outdoor shelters become focal points through strategic string lighting—internal mounting creates glowing lantern effects visible across properties. Garden path markers employ shepherd’s hook stakes supporting dangling string light drops every 6-8 feet, providing wayfinding while minimizing tripping hazards.
A suburban homeowner transformed her featureless 80×40-foot backyard through zoned string lighting approaches. The covered patio received zigzag commercial LED strings creating 12 footcandles over the dining table—bright enough for meals and games. An open lawn area 40 feet distant employed solar-powered mini lights strung between shepherd’s hooks, dividing children’s play zones from seating areas with glowing boundaries. Fence-mounted perimeter lighting (low-voltage on timers) outlined property lines while illuminating perennial beds. This layered approach—bright functional task lighting near the home, softer ambient lighting in mid-yard zones, and accent lighting at property edges—created distinct outdoor rooms multiplying usable space. Total investment ran $850 across three years of incremental installation, while comparable landscape lighting quotes exceeded $3,500.
Common Installation Mistakes and Solutions
Even experienced installers encounter challenges during string lighting backyard projects. Recognizing common pitfalls and their remedies prevents subpar results and dangerous conditions.
Voltage Drop Issues and Wire Sizing
<strong>Voltage drop issues manifest as noticeably dimmer bulbs toward strand ends. This results from electrical resistance in the wire reducing available voltage. The NEC permits maximum 3% voltage drop for branch circuits (3.6V on 120V systems), though string light wiring accumulates greater losses. For wire gauge and length combinations, the formula Voltage Drop = (2 × L × R × I) / 1000 where L=length in feet, R=resistance per 1000 feet (6.4Ω for 16 AWG, 4.0Ω for 14 AWG), and I=current in amps. A 100-foot run of 16 AWG wire carrying 2 amps experiences (2 × 100 × 6.4 × 2) / 1000 = 2.56V drop—visible dimming. Solutions include limiting strand lengths to manufacturer specifications (typically 150-200 feet for LED, less for incandescent), using heavier wire gauge when permitted, or providing power at intermediate points rather than daisy-chaining from single sources. Low-voltage systems exacerbate this issue; 24V systems tolerate approximately half the length of equivalent 120V installations before dimming becomes objectionable.</p>
Weatherproofing Connection Failures
Weatherproofing failures rank among the most common premature failure causes. The connector where string lights meet extensions or outlets presents the primary vulnerability. Even “weatherproof” connections fail when exposed to direct rain, sprinkler spray, or standing water. Elevate all connections above grade, ideally under eaves or protected by weatherproof covers. Where exposed connections become necessary, employ purpose-built weatherproof junction boxes with threaded cable entries and sealed covers. Silicone tape (self-fusing) wrapped over connection points provides additional moisture barriers. Avoid standard electrical tape outdoors; adhesives fail in UV exposure and temperature cycles, leaving connections exposed within months. Another common error involves inadequately secured end caps on unused female sockets. These cap missing bulb positions and must seal tightly to prevent moisture entry causing corrosion and shorts.
Circuit Overloading Problems
Overloading circuits occurs when connecting too many strands in series. Manufacturers specify maximum connectable units (often 3-5 for LED, 2-3 for incandescent) based on cumulative current and wire capacity. Exceeding limits may not trip breakers immediately but generates excessive heat in wire and connectors. This heat degrades insulation, increasing failure risk and fire hazard. The proper solution involves parallel circuits—multiple independent runs each plugging into separate outlets or different breaker circuits. For large installations, consider dedicated 20A circuits feeding multiple outlet boxes strategically positioned to avoid serial connections. Never defeat GFCI protection by plugging string lights into non-GFCI circuits, even temporarily. If GFCI nuisance tripping occurs (common in damp conditions), suspect damaged insulation or moisture intrusion requiring repair, not protection removal.
Improper Tensioning Mistakes
Improper tensioning creates either excessive sag or overstressed hardware. Excessive sag appears droopy and unprofessional while increasing wind vulnerability and tripping hazards from low-hanging loops. Conversely, drum-tight installations strain anchor points potentially pulling hooks from mounting surfaces while stressing bulb sockets and wire insulation. The target involves moderate tension creating 6-12 inch sag per 10 feet of span—enough catenary curve appearing natural without excessive droop. Turnbuckles on guide wire systems enable seasonal adjustment compensating for thermal expansion/contraction (wire lengths change ~0.1% per 30°F temperature swing). For direct string light mounting without guide wires, accept slightly greater sag as over-tensioning risks wire damage. During installation, have an assistant observe from expected viewing angles ensuring aesthetics meet intentions—appearances vary dramatically across perspectives.
Mounting Height Errors
Mounting height errors compromise both function and safety. Too-low installations (under 7 feet over walkways) create head-strike hazards, particularly dangerous with glass bulbs. Building codes in many jurisdictions mandate 7-foot minimum clearance over pedestrian paths, 8 feet over parking areas. Too-high installations (>12 feet for ambient lighting) increase installation difficulty while reducing effective illumination—light intensity follows inverse square law, dropping to 1/4 brightness when distance doubles. For dining and task areas, 8-10 feet provides optimal balance of clearance and brightness. For ambient zones, 10-12 feet works well. Consider sightlines: lights positioned where viewers look directly at bulbs cause glare, while those mounted higher direct light downward appearing softer.
An apartment dweller’s temporary patio installation illustrated several mistakes. He used cheap consumer-grade lights with inadequate weather sealing—first rain caused multiple socket failures. Connections draped on the ground accumulated standing water, shorting the strand. Six strands connected serially severely dimmed the farthest units while generating heat at connection points. After one season, complete replacement became necessary. With proper products (commercial LED), elevated weatherproof connections, and three separate circuits rather than serial linking, the $85 spent would have lasted 5+ years instead of one failed season. The lesson: cutting installation corners rarely saves money, merely delays problems to inconvenient moments requiring rushed repairs.
Maintenance, Troubleshooting, and Seasonal Care
Ongoing string lighting backyard maintenance determines the practical lifespan achieved from initial installations. Systematic care prevents premature failures while ensuring consistent performance.
Quarterly Inspection Procedures
Routine inspections should occur quarterly at minimum, more frequently for heavily used installations. Walk the entire run examining physical condition. Check for loose bulbs—vibration and thermal cycles gradually loosen socket connections. Tighten any wobbling bulbs gently, avoiding over-torquing that cracks plastic bases. Inspect wire insulation for cracks, cuts, or abrasions exposing conductors. Even small damage admits moisture causing corrosion and shorts. Repair immediately using quality electrical tape or heat-shrink tubing, or replace damaged sections if compromise is extensive. Examine mounting hardware for rust or loosening—coastal salt air accelerates corrosion on steel hardware. Replace any rusted hooks or clips with stainless steel alternatives. Check structural anchor points (trees, posts, buildings) for movement or deterioration. Trees grow, potentially distorting wire or displacing hardware. Buildings settle or suffer rot, weakening mounting surfaces.
Cleaning and Bulb Maintenance
Cleaning procedures restore appearance and performance. Accumulated dust, pollen, and atmospheric pollutants reduce light output 15-30% over time, particularly on plastic bulbs. Use mild detergent solutions with soft cloths, avoiding abrasive materials scratching surfaces. For bulbs in sockets, dampen cloths and wipe carefully, preventing water entry into sockets. Many quality LED bulbs feature removable globes simplifying cleaning—remove, wash, dry thoroughly, and reinstall. For wire and sockets, spot-clean visible accumulations but avoid pressure washing or soaking that forces moisture into sealed components. In coastal environments, annual deep cleaning removes salt deposits accelerating corrosion. Agricultural zones may require more frequent cleaning during heavy pollen seasons or harvest dust periods.
Bulb Replacement Strategies
Bulb replacement extends functional life. LED bulbs rarely fail entirely; instead, they dim gradually over 25,000-50,000 hours, eventually reducing to 70% of initial output (the industry-standard L70 lifespan specification). At this point, inconsistent brightness across strands becomes noticeable. For most installations operating 4 hours daily, this represents 17-34 years—beyond many mounting hardware lifespans. When bulb replacement becomes necessary, match specifications exactly: voltage, wattage, base type, and ideally the same manufacturer/model. Mixing bulb types creates visible inconsistency in color temperature and brightness. Some LEDs employ proprietary bases or non-removable integration into sockets, requiring complete strand replacement. Factor this into initial purchasing decisions—replaceable-bulb designs offer flexibility despite slightly higher upfront costs.
Seasonal Adjustments and Care
Seasonal considerations vary regionally. In cold climates, thermal cycling (freezing nights, warm days) stresses wire and connections. Check installations in early spring for winter damage before season startup. In hot climates, UV exposure intensifies during summer; UV-stable products become essential. For installations subject to snow loading, reduce tension slightly during winter preventing overload when ice accumulates. Some homeowners remove string lights entirely during severe weather seasons, storing indoors to maximize lifespan—this approach makes sense for non-commercial-grade products in harsh climates but becomes unnecessary with quality permanent installations. Timer controls reduce operating hours during periods of less outdoor use, extending bulb life and reducing energy costs without installation/removal effort.
Electrical Troubleshooting Methods
Troubleshooting electrical issues requires systematic approaches. For sections not illuminating: (1) Verify outlet has power via voltage tester. (2) Check GFCI hasn’t tripped—reset if necessary. (3) Examine connections for security. (4) Test individual bulbs in working sections to isolate dead bulbs breaking series circuits (common in incandescent strands). (5) Look for damaged wire or corroded sockets admitting moisture. (6) Measure voltage at strand endpoints; significant drops indicate wire damage or overloading. For flickering: suspect loose bulbs, deteriorating connections, or inadequate wire gauge for load. For partial illumination: many LED strands feature parallel circuits; individual circuit failures illuminate 1/2 or 1/3 of bulbs while leaving sections dark. Manufacturer technical support provides circuit diagrams enabling precise diagnosis. When troubleshooting proves unproductive, replacement typically costs less than extensive repair time.
Technology Upgrade Opportunities
Upgrade opportunities emerge as technology advances. Smart controls now enable app-based dimming, scheduling, and color changes for string lights. Retrofit smart plugs or smart switches into existing installations without rewiring. Solar panel efficiencies improved dramatically since 2020; replacing old solar units with current products may double output and reliability. New connector systems simplify expansion or reconfiguration. When performing maintenance, consider whether modest additional investments achieve meaningful capability enhancements over simple repairs.
A commercial restaurant maintained 400 feet of string lighting across their outdoor patio through systematic quarterly inspections. Each inspection required approximately 60 minutes total: testing all circuits (15 min), examining connections and wire condition (25 min), checking mounting security (15 min), and cleaning visible bulbs and sockets (20 min, rotating sections). This diligence identified a deteriorating junction box before water intrusion caused failures and caught loosening deck screws before collapse. Over six years, they replaced one 48-foot section due to wire damage (suspected rodent chewing) but otherwise maintained the original installation with zero lighting failures during service hours. Their calculated maintenance cost ran approximately $25/year in labor (DIY) versus replacement costs exceeding $350 per failure event. The reliability translated to customer satisfaction—consistently lit attractive spaces became a review-mentioned asset drawing repeat business.
Cost Analysis: Budgeting Your String Lighting Project
Understanding complete costs prevents budget surprises and enables informed decision-making during string lighting backyard planning. Costs span initial installation, ongoing electricity, and long-term maintenance.
Initial equipment costs
vary dramatically with quality tier and installation scale. For a typical 50-foot patio coverage, budget the following ranges:
Entry-level consumer installation: $45-75 for two 25-foot LED strands, $15-25 for mounting hardware, $10-15 for extension cord, $5 for miscellaneous fasteners = $75-120 total. These products feature minimal weather sealing, lighter wire gauge (20-22 AWG), and 2-3 year expected lifespan in exposed conditions.
Mid-tier quality installation: $90-140 for commercial-grade LED strands, $25-40 for stainless mounting hardware, $20-30 for 12 AWG extension cord, $15-20 for weatherproof junction boxes and fasteners = $150-230 total. Improved durability enables 5-8 year service life.
Premium permanent installation: $140-220 for heavy-duty commercial strands with replaceable bulbs, $40-60 for guide wire systems with turnbuckles, $30-45 for professional weatherproof components, $20-30 for premium stainless hardware = $230-355 total. Expected lifespan reaches 10-15+ years.
For installations requiring dedicated electrical work, add $200-500 for outlet installation by licensed electricians (varies regionally and by complexity), or $1,000-2,500 for complete circuit additions in remote yard locations. Low-voltage transformer systems add $80-200 for quality transformers plus installation premium. Solar options reduce equipment costs slightly ($50-90 for equivalent strand lengths) while eliminating electrical work, but accept performance limitations noted earlier.
Operating electricity costs
remain minimal for LED technology. Calculate using the formula: (Total Watts / 1000) × Hours per Day × Days per Year × Cost per kWh. For a typical 100-foot installation with fifty 1-watt LED bulbs, operating 4 hours daily at $0.13/kWh: (50W / 1000) × 4 hours × 365 days × $0.13 = $9.49 annually. Equivalent incandescent installation (fifty 5-watt bulbs): $47.45 annually—a 5x difference. Over 10 years, LED consumes $95 electricity versus $475 for incandescent, often exceeding initial LED premiums even before factoring replacement costs. For cost-conscious projects, this math strongly favors LED regardless of higher purchase prices. Solar installations eliminate operating costs entirely, though include opportunity costs of initial savings that could otherwise earn investment returns.
Maintenance costs
accrue gradually. DIY maintenance requires minimal cash outlays—replacement bulbs ($1-5 each), occasional new mounting hardware ($10-20), updated weatherproof components ($15-25)—totaling perhaps $20-40 annually. Professional maintenance runs $100-200 per service call for inspection and minor repairs, though most homeowners handle string lighting maintenance personally given accessibility and simple nature. The primary maintenance “cost” involves time: plan 1-2 hours quarterly for inspections and cleaning, 2-4 hours annually for detailed maintenance, and occasional hours for troubleshooting and repairs. Value this time appropriately; some prefer professional service eliminating personal effort.
Replacement timelines
establish long-term budget projections. Consumer-grade products in fully exposed locations: 2-3 years. Mid-tier commercial products: 5-8 years. Premium commercial products: 10-15+ years. Solar products: 3-6 years (battery and panel degradation). These timelines assume reasonable maintenance and typical weather exposure. Exceptionally harsh environments (extreme sun, salt air, severe storms) reduce all estimates 30-50%. Protected installations under rooflines or seasonal storage during harsh months extend all estimates 30-80%. For budgeting, divide initial costs by expected years to calculate annual equivalent cost: a $200 premium installation lasting 12 years costs $16.67 annually, versus a $90 consumer installation replaced every 2.5 years costing $36 annually—the premium installation actually costs 54% less per year while eliminating frequent replacement hassles.
Return on investment
calculations demonstrate economic viability for homes considering sales. Real estate studies indicate quality landscape lighting including string lights adds 2-4% to perceived home values, with buyers consistently ranking outdoor spaces and lighting among top desirable features. For a $400,000 home, even a conservative 2% value increase ($8,000) vastly exceeds typical string lighting costs ($200-600). The practical ROI measures expanded living space value: homeowners report 40-60% increased evening outdoor time after installing string lighting, effectively gaining 200-400 square feet of usable space for approximately $1-2 per square foot—dramatically cheaper than interior additions. Time-value calculations factor evening outdoor hours gained × personal value of leisure time, though subjective metrics vary widely by household.
A mid-sized suburban property case study tracked costs over 8 years. Initial installation (2017): $425 for commercial-grade LED strands, weatherproof components, and quality hardware covering 150 feet. Annual electricity: $18. Maintenance materials (bulbs, fasteners): $140 over 8 years. Total 8-year cost: $709, averaging $88.63 annually. This provided 1,200+ hours of family use, 24 entertaining events, and immeasurable aesthetic enjoyment. Zero unscheduled failures or dark periods occurred. Comparable professionally-installed landscape lighting quotes for equivalent coverage started at $1,800-2,400 initially, though admittedly offered more sophisticated controls and styling. For this homeowner’s priorities and budget, string lighting delivered superior cost-effectiveness while enabling DIY installation satisfaction.
Frequently Asked Questions
How do I choose between plug-in and solar string lights?
Plug-in LED systems deliver superior brightness (800-1200 lumens vs 200-400 for solar), unlimited runtime, and consistent performance regardless of weather. Select plug-in when outlets exist within 100 feet, you need reliable task lighting, or your location experiences frequent cloudy periods. Solar works best for accent lighting in remote areas lacking electrical access, seasonal decorative displays, or situations where trenching for power proves cost-prohibitive. In sunny regions like the Southwest, quality solar systems perform adequately, while Pacific Northwest or Northeastern winter conditions render solar less practical.
Can I leave outdoor string lights up year-round?
Commercial-grade string lights with IP65+ weather ratings and UV-stabilized components withstand year-round exposure across most climates. Consumer-grade products degrade rapidly when left exposed 12 months, particularly in regions with temperature extremes or intense sun. For permanent installation, invest in commercial products featuring SJTW wire, gasketed sockets, and shatterproof bulbs. In harsh climates (extreme heat, severe winter storms, intense UV), even commercial products benefit from reduced tension during winter months. Regions experiencing moderate weather can expect 8-12 year service from quality permanent installations.
What causes string lights to flicker or dim?
Flickering typically indicates loose bulbs, deteriorating connections, or incompatible dimmers. Tighten all bulbs gently and verify connections seat fully. If using dimmers, ensure they’re LED-compatible (older incandescent dimmers cause LED flicker). Dimming toward strand ends signals voltage drop from excessive length or inadequate wire gauge. Solutions include shortening runs, using heavier gauge wire where possible, or providing power at intermediate points rather than daisy-chaining from single sources. Widespread flickering across entire systems may indicate failing transformers (low-voltage systems) or utility power quality issues requiring electrician evaluation.
How many strands can I connect together safely?
Manufacturers specify maximum connectable units based on cumulative current and wire gauge, typically 3-5 strands for LED systems, 2-3 for incandescent. Exceeding limits generates excessive heat in wiring and connectors, degrading insulation and creating fire hazards. The specifications account for wire ampacity limits and ensure voltage at far endpoints remains adequate for proper illumination. When larger installations require more coverage, employ parallel circuits with multiple independent runs each plugging into separate outlets. Never series-connect beyond manufacturer specifications regardless of apparent electrical capacity remaining.
Do string lights attract insects?
Traditional incandescent bulbs emitting significant UV wavelengths attract insects more than modern LEDs. LED string lights produce minimal UV radiation, dramatically reducing insect attraction compared to older technology. However, brightness itself draws certain insects, though warm white LEDs (2700-3000K) attract fewer insects than cool white or daylight spectrums. For highly insect-sensitive areas, consider yellow-tinted “bug lights” (available in LED versions) blocking blue wavelengths most attractive to insects. Combining string lighting with citronella candles or fans dispersing insects provides additional non-chemical control.
What should I do if a section of lights stops working?
First, verify power at the outlet using a voltage tester. Check if GFCI protection tripped (reset if necessary). Examine all connections for security—loose plugs frequently cause section failures. For incandescent strands wired in series, a single bad bulb breaks the circuit; test bulbs individually in a working strand to identify failures. LED strands typically feature parallel circuits; section failures may indicate damaged wire or failed internal components often requiring complete strand replacement. Look for physical damage (cuts, burn marks, or corroded connections) indicating repair points. When troubleshooting proves unproductive, replacement typically costs less than extensive repair time, particularly for consumer-grade products.
Key Takeaways
- Power source selection fundamentally impacts performance: Plug-in AC systems deliver consistent brightness and unlimited runtime, solar offers installation flexibility with performance limitations, while low-voltage systems balance safety with capability.
- Quality matters significantly for outdoor applications: Commercial-grade products with IP65+ ratings, SJTW wire, and UV-stabilized materials outlast consumer alternatives by 3-5x while requiring less maintenance and delivering superior reliability.
- Planning prevents installation problems: Accurate measurements, secure anchor point identification, and proper electrical calculations before purchasing equipment eliminate the frustration of mid-project discoveries requiring rework or additional purchases.
- Safety codes exist for vital reasons: GFCI protection, proper wire sizing, weatherproof connections, and UL-listed products prevent electrical hazards that can injure people or damage property—cutting corners on safety proves penny-wise and pound-foolish.
- Systematic maintenance extends service life dramatically: Quarterly inspections, prompt minor repairs, and seasonal adjustments keep installations performing reliably while catching small issues before they cascade into expensive failures.